Supplies
- Gingham fabric (I used 1/2 yard of backing fabric, and bought 1/4 yard each of 3 reds and 3 blues, but I had quite a bit of leftover fabric that I will use for napkins)
- Scissors
- Sewing machine & thread
- Paper & pen or pencil
- Cut 6: 10x12 inch rectangles of backing fabric.
- Cut 2 reds, and 1 blue: 10x12 inch rectangles.
- Cut 2 blues, and 1 red: 8x10 inch rectangles.
- Draw a tall star on a piece of paper.
- Cut a star on each of the 8x10 inch rectangles.
- Stack two layers of the background fabric, one of the large rectangles and a contrasting star.
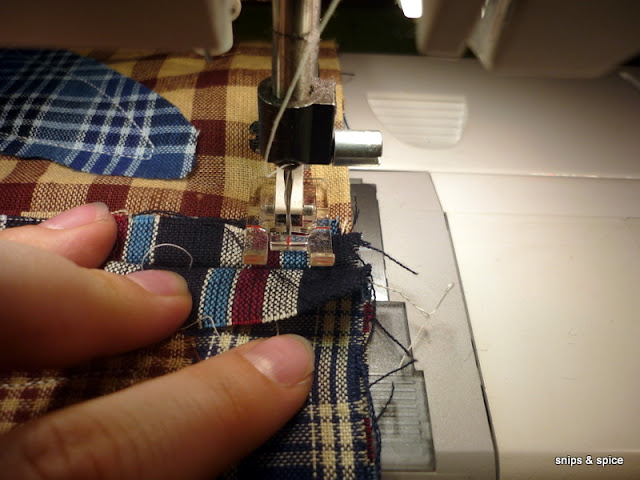
- Sew through all four layers 1/4 inch from the edge of the star (on the inside of the star, so you are sewing the star down to the other fabric).
- Repeat steps 6-7 for all three blocks.
- Sew two of the blocks together by stacking backs together using a 3/8 inch seam allowance. Repeat to join last star.
- Sew around the edge of the table runner. Be sure to open seams when sewing over them.
- Snip around the table runner, around each star, along the seams. Be careful not to snip through your seam.
- When you are finished, it will look like this:
- All you need to do now is wash your table runner in your washing machine, and dry in the dryer. This will shrink up and crinkle the edges of your stars, seams, and the edges of the table runner. Make sure you empty the lint trap in your dryer before and after you dry your table runner.


Oooh! I like it! Very patriotic! And sort of country cottage at the same time! :)
ReplyDeleteExcellent!! I've made a few rag quilts and love doing them since they're so easy. I never thought of doing something like a star in the pattern! Thanks so much for sharing this. Next time I get out my sewing machine, I'm doing this for sure!
ReplyDeleteCheers,
Tracy Screaming Sardine
Totally cute! I love it. We are hosting our very first link up party on Sunday, and would love to have you link this up!! Thanks for sharing.
ReplyDeleteBritney
www.jandmseyecandy.blogspot.com
What a cute idea. I love the plaid fabric. I'm a new follower. Hope to see you at http://diyhshp.blogspot.com/
ReplyDeleteP.S. I have a link party every Monday. Would love for you to stop by and link up your table runner.
What a nice table runner--perfect for the 4th! :)
ReplyDeleteThis is great! I have some left-over material from a wreath I've nearly finished. I can use the scraps to make this! I am pinning it to my Pinterest board!
ReplyDeletethis is fabulous
ReplyDeleteI Love stars too. That is pretty impressive - a star taller than you? I wish I had one of these table runners. Will you make me one?
ReplyDeleteThis is so cute! I wish I had one of these for our table. Thanks for linking up with me last week!
ReplyDeletelove it! I'm featuring you tomorrow at naptimecrafters.blogspot.com
ReplyDeleteThanks so much for your nice comment on the apron. You have a lovely blog and this runner is adorable!
ReplyDeleteLove the post! Interesting work
ReplyDeletehttp://www.askapparels.com/products.html
Can I ask a dumb question? lol Well I am anyways... Why do you need two backing fabrics? Is it so you have more seams to cut and make it ragged? I love your project and the tutorial/with the pictures is easy to understand. Thanks for sharing!
ReplyDeleteI have been looking for a store that carries this fabric. I refer to it as "homespun fabric." It is a very county looking fabric. No one seems to carry it. Is there a web site I can order it from. Thanks Harriet, mrsjayl@embarqmail.com
ReplyDelete