Pages Navigation Bar

Showing posts with label Home Decor. Show all posts

Wednesday, June 15, 2011

Independence Day (July 4th) Table Runner

Sewing tutorial for making a star, rag quilt table runner
I am sort of obsessed with stars; I actually have a metal star that is taller than I am hanging on the wall of my home.  I look for any excuse to include stars on my decor, crafts, or dress.  We made these table runners for Super Saturday a few years ago in the fall using fall colors.  You will spend more time cutting than actually sewing this table runner.  This is a great project for new sewer because there is a lot of forgiveness with this project.

Supplies
  • Gingham fabric (I used 1/2 yard of backing fabric, and bought 1/4 yard each of 3 reds and 3 blues, but I had quite a bit of leftover fabric that I will use for napkins)
  • Scissors
  • Sewing machine & thread
  • Paper & pen or pencil
Directions
  1. Cut 6: 10x12 inch rectangles of backing fabric.
  2. Cut 2 reds, and 1 blue: 10x12 inch rectangles.
  3. Cut 2 blues, and 1 red: 8x10 inch rectangles.
  4. Draw a tall star on a piece of paper.
  5. Cut a star on each of the 8x10 inch rectangles.
  6. Stack two layers of the background fabric, one of the large rectangles and a contrasting star.
  7. Sewing tutorial for making a star, rag quilt table runner
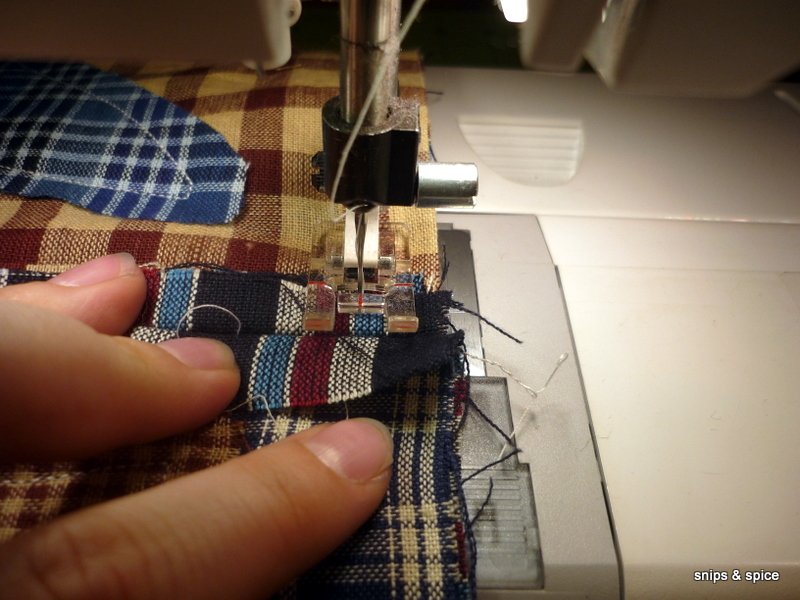
  8. Sew through all four layers 1/4 inch from the edge of the star (on the inside of the star, so you are sewing the star down to the other fabric).
  9. Sewing tutorial for making a star, rag quilt table runner
  10. Repeat steps 6-7 for all three blocks.
  11. Sew two of the blocks together by stacking backs together using a 3/8 inch seam allowance.  Repeat to join last star.
  12. Sew around the edge of the table runner.  Be sure to open seams when sewing over them.
  13. Sewing tutorial for making a star, rag quilt table runner
  14. Snip around the table runner, around each star, along the seams.  Be careful not to snip through your seam.
  15. Sewing tutorial for making a star, rag quilt table runner
  16. When you are finished, it will look like this:
  17. Sewing tutorial for making a star, rag quilt table runner
  18. All you need to do now is wash your table runner in your washing machine, and dry in the dryer.  This will shrink up and crinkle the edges of your stars, seams, and the edges of the table runner.  Make sure you empty the lint trap in your dryer before and after you dry your table runner.

Saturday, February 5, 2011

Valentine Wreaths {Part Three}

Tutorial for making a felt roses Valentine wreath
I previously showed you how to make two other Valentine wreaths (the boa wreath, and the yarn wreath).  I saved this one for last because although it is easy, it is very time consuming.  That being said, I think this might be my favorite.

Supplies
  • Scissors
  • Lots of red felt (about 13 sheets)
  • Low-melt glue gun and sticks
  • 12 inch wire wreath frame
  • Ribbon to hang (I used 7/8 inch wide white grosgrain ribbon)
  • Spool of 5/8 inch red velvet ribbon
Directions
  1. Make 90 felt roses.  I made them with one 2 inch diameter circle, and one 2.5 inch diameter circle each.
  2. Glue ribbon to the top of the wire frame--this helps the roses stay in place while you are gluing, and fills the gap between roses.
  3. Stick the roses into the frame (4 roses in each segment of the inside circle, 5 roses in each segment of the middle circle, and 6 roses in each segment of the outside circle).  Tie the ribbon through and hang.
Tutorial for making a felt roses Valentine wreath

I will be linking to these link parties.

Friday, February 4, 2011

Valentine Wreaths {Part Two}

Tutorial for making a yarn Valentine's Day wreath
Whew!  Going back to work mid-week took it out of me.  I already showed you how to make a boa wreath for Valentine's Day, and I will be showing how to make a felt roses wreath, but today, I am going to share how to make the yarn wreath with you.  Have you ever been to the site Knock Knocking?  I love all of her beautiful creations.  She was my inspiration when making this wreath.

Although, I am going to be honest and tell you that I struggled with this one a little.  Have I mentioned that I have a very "type-A" personality?  Well, I do.  I had a hard time trying to wrap the yarn without overlapping, but while covering the entire wreath.  It can't happen.  You have to do some double-wrapping.  The inside has less area than the outside, so unless you have yarn that magically increases in width on the outside, and decreases in width on the inside, you will have to double wrap.  If you can handle that (I almost couldn't) then you should be fine.

Supplies
  • 10 inch wreath base
  • Batting
  • Low-melt glue gun & glue sticks
  • 1 skein of yarn (I used a chunky weight to make the wrapping much quicker)
  • Four colors of felt (I used white, light pink, dark pink, and red)
  • Straight pins
  • Ribbon (I used 5/8 inch velvet)
  • Two small glass christmas balls
  • Scissors
Directions
  1. Plug in you hot glue gun.  Cut your batting into strips and wrap around the wreath base.  Secure with hot glue.  Then wrap and wrap and wrap the yarn until the entire base is covered.  (Remember, you will have to overlap).  Secure the ends with glue.
  2. Tutorial for making a yarn Valentine's Day wreath
  3. Wasn't that easy?  Now you can decorate.  The great thing about this wreath, is that all my decorations are secured to the wreath with straight pins, so I can take them off and decorate for another holiday!  I made three felt pinwheels and three felt roses.  I cut the bottom off the roses so they would be flatter to the wreath.  These were all secured to the wreath with a straight pin down the center.
  4. Tutorial for making a yarn Valentine's Day wreath
    Tutorial for making a yarn Valentine's Day wreath
  5. I made ribbon leaves by cutting short strips of ribbon, folding them in half with all right sides up, and pinning them to the wreath.
  6. The chain I made by cutting 3 inch strips of felt, and gluing them together.  This I also secured to the wreath with pins.
  7. I did use glue to add the glass balls, but I glued them to the other decorations, so all of it can be removed easily.
  8. The final step is to use the ribbon to create a loop and bow to hang the wreath.
What do you think?  Have you made any wreaths lately?  Want to share?

I will be linking this to these link parties.

Wednesday, February 2, 2011

Valentine Wreaths {Part One}

Tutorial for making Valentine wreaths
I am loving all the different wreaths our there in blog land.  I started the felt rose wreath a couple weeks ago, but it used 90 roses, so it took a while to finish.  Today I am going to share how to make the fastest and easiest of the three--the marabou & ribbon wreath.  One aspect about this that I really love is that I only used 3 pins to secure the entire wreath, so I can remake this for every holiday with a quick change of color.

Supplies
  • 10 inch Styrofoam wreath base
  • 18 feet of 7/8 inch grosgrain ribbon
  • 6 ft marabou boa
  • 3 straight pins
  • scissors
Directions
  1. Wrap the ribbon around the wreath base, covering the entire base with the ribbon.  Use a straight pin to hold the beginning in place, and when you reach that point again, remove the pin, and stick through both layers.  Cut off excess ribbon.  The pin should hold both ends of ribbon.  (Your pins should all be on the back of the wreath)
  2. Tutorial for making Valentine wreaths
  3. Pin one end of the boa to the wreath.  Wrap the boa around the wreath, leaving space between each wrap, until you reach your starting point.  I spaced mine out so the two ends met at the same part at the back of the wreath.  I like the look of the dark ribbon poking through, but you could use two boas and cover the wreath entirely.
  4. Tutorial for making Valentine wreaths
  5. Take the leftover ribbon, make a loop through the wreath, tie into a bow, and hang.
Tutorial for making Valentine wreaths
I haven't decided if I am going to add any other decoration to this one.  Thoughts?

Click here to see the felt roses wreath, and the yarn wreath.

I will be linking to these link parties.

Tuesday, January 18, 2011

Subway Art {Free Printables}

Subway art is everywhere these days—and why not?  You can design it to say whatever you want, in any color(s) you want.  I am trying to create a photo and art wall in my little condo, so I spent some time last night in Print Artist creating my very own subway art.  I love this quote by Mark Twain, and I wanted something that would tie together all our throw pillows which are green, yellow-gold, red, and brown.


Here is what I came up with:

I like both, but I am not sure which one I want to hang on our wall.  Opinions?

I also used www.picnik.com to tint the entire image in pinks and reds for Valentine's Day.  If you don’t yet know picnik, you should  go introduce yourself.  I’m sure you will become quick friends.  If you like these, simply click on the image, then when you are taken to the image page, right click and save to your computer.  Then you can print, or upload to picnik and change the size or colors to suit your fancy.

If you want to create your own, check out this tutorial at I am Momma hear me roar!

Tuesday, December 21, 2010

Holiday Centerpiece

This is so easy to make, you will want to make one for a friend!

Supplies
  • 3 packages of small glass ball ornaments (can buy at Michael's for $1.99, but they are often on sale for less)
  • One small wreath, or straight spray (I liked the straight one, because it can turn into a smaller circle than most wreaths)
  • 5 decorative pieces for wreath (there is a vast array to choose from at the craft store, pick ones that suit your taste)
  • Small floating candle
  • Glass candle holder (this one has a cylinder for a base, and then a hanging insert for the candle)
  • One pair of scissors
Instructions
  1. Remove all tags/stickers from supplies
  2. Remove the glass balls from package
  3. The ones I bought have a small wire sticking out the top of each one--cut the wire off using the scissors
  4. Fill the base of the candle holder with the glass balls
  5. Bend the straight wreath into a circle
  6. Use one of the "branches" to wrap around the two ends (securing the wreath into a circle)
  7. Place the decorations in even intervals around the wreath
  8. Secure each decoration by pulling tight to the wreath and wrapping the stem of the decoration around the base of the wreath several times
  9. Fill the top of the candle holder about 2/3 with water
  10. Place the floating candle in the top of the holder
  11. Place the wreath in the center of the table, and put the candle holder in the center of the wreath

Saturday, December 18, 2010

Christmas Stocking

Materials (for one stocking):
  • 1/2 yard double-sided quilted fabric
  • 1 yard cording with lip
  • 6 inches ribbon
  • 1/3 yard or 1 fat quarter microfiber fleece
  • matching thread
Supplies:
Directions: (note all seam allowances are about 3/8 or 1/2 inch)
  1. Fold quilted fabric in half
  2. Pin template to the fabric (make sure to pin through both layers)
  3. Cut through both layers to create front and back of stocking
  4. Using a zipper foot, or a needle and thread, sew cording  onto the right side (the outside) of one side of the stocking (you will line up the edge of the lip with the edge of the fabric--you want to get as close to the cording itself as possible)
  5. Put the two right sides together (the outsides so they are on the inside)
  6. Sew the two sides together either by hand with a needle and thread, or on machine with the zipper foot
  7. Cut the microfiber to a 10" by 18.5" rectangle
  8. Sew the two short edges together (so you have a 10" tall cylinder with an 18" circumference)
  9. Fold the fabric in half with the seam on the inside (you will now have a 5" tall cylinder with an 18" circumference)
  10. Fit the cylinder over the stocking, matching the seam of the cylinder with the back seam of the stocking--over the heel (the raw edge of the cylinder should match the raw edge of the stocking)
  11. Fold the ribbon in half
  12. Place the ribbon between the stocking and the microfiber at the back seam, pinning the ribbon so the raw edge matches the raw edge of both fabrics
  13. Sew the microfiber to the stocking
  14. When you turn the stocking right side out, you should be able to fold the microfiber out so that the seam is on the inside of the stocking, and the ribbon is ready to hang the stocking
  15. You may also choose to embellish with embroidery, applique, or cross stitching