Showing posts with label Gifts. Show all posts
Wednesday, June 20, 2012
Brooke's Wedding Blanket
One of my favorite gifts to give for a wedding is this wedding blanket. I lucked out right at Christmas time this year and found these throw blankets at K-Mart for less than $20, which is way cheaper than buying the fake fur and minky fabric out of which these are made. One side is the soft and slinky minky fabric, but the other is like a fake sheep's wool.
I bought three and planned on saving them for future weddings, but I couldn't help myself. Adam and I now have two of them on our couches because they are so soft and comfy. The third I used for my sister's wedding. All I had to do was rip out the seam in the corner to separate the top and bottom fabrics, embroider, and resew the seam right up. It was quick and easy, and made this gorgeous blanket. My sister and her husband said it is their favorite blanket to cuddle under.
Wednesday, June 8, 2011
The Wedding Blanket
While I truly loved and appreciated everything we received for our wedding, one gift has won out for the favorite over the past year and a half. A family friend gave us a faux fur blanket with our names and wedding date embroidered on it. I have never been much into faux fur, but I love this blanket. It sounds silly, but we use this blanket spring, summer, fall, and winter.
A few months ago, I made a similar blanket for a family friend for her bridal shower, and last week, I made another one for a friend for his open house.
The wedding blanket is made using the same method as this blanket, but on a larger scale. I bought 2 and 1/3 yards fabric (60 inch wide), then followed the same process as before. I buy one side of faux fur, and one side of thin suede. I recommend embroidering on the thin suede. The faux fur is a little too thick to easily fit in the embroidery hoop, and the needles break. When sewing with faux fur, use a rounded (stretchy) needle instead of a sharp.
The newlyweds will love to cuddle under this luxurious blanket for year to come as they remember their big day!
Tuesday, May 10, 2011
Soldered Pin
You may have seen this posted at Tatertots and Jello, but for those of you who haven't here is a neat Mother's Day gift. For Mother's Day, I wanted to create a cute pin for my sister-in-law. She has the two cutest kids! George (curious George) also made the cut because he goes everywhere the kids do. I placed a cute picture on one side of each pendant, then a colorful background on the other. There are lots of fancy alphabets and backgrounds on Etsy that you can purchase if you want something already done, or you could use drawings of your own.
To make a this soldered pendant pin, you will need the following items:
1. Soldering iron
2. Metal tray & sponge with water (I found the tray at the dollar store)
3. Small clamp
4. Solder
5. Foiling tape
6. Memory glass (I used 1 inch squares)
7. Tinning flux
8. Printout of whatever you want in your necklace (not pictured)
9. Q-tips (not pictured)
10. Tweezers (not pictured)
11. Pin (not pictured)
12. Jewelry rings (not pictured)
You should be able to find all of these at your local craft store. Don't worry, this is actually much easier than it looks. Are you ready? Plu gin the soldering iron to heat, and let's go!
Cut your paper/photos to fit your glass pieces. You want the paper slightly smaller than the glass. Place your two images back to back and sandwich between the glass pieces.
Cut a piece of foiling tape about 4 and 1/4 inches. Tape around the edge of the glass. Flatten the foil all around the edge, and wrap on each side. You may want to use the back of a spoon, or a popsicle stick to make sure the foil is stuck down.
Rub a q-tip in the flux, and rub a thin layer of flux over all of the foil. This is what makes the solder stick to the foil.
Unroll some solder from the coil. Melt solder onto the tip of the iron, then rub a thin layer of solder onto the foil. Cover the foil completely. (If the tip of your soldering iron is not shiny, melt solder on it, then wipe on the wet sponge)
Rub a little more flux where you want to connect your ring. Hold the ring with your tweezers, and solder to your pendant.
Now you can add your pendant to your pin. Repeat with the rest of your pendants, then wear or give as a gift!
Some tips:
- don’t touch anything with your fingers—it’s hot!
- don’t mess too much with the solder once it’s on the pendant
- if you have any sharp bumps, file with a nail file
- if you have any gunk on your glass, clean with rubbing alcohol
- if you have black spots on your solder, rub with steel wool
- have fun with this—it’s not a perfect craft
Tuesday, March 15, 2011
Hooded & Pleated Baby Towel
This is one of my favorite baby shower gifts. These towels are perfect for cradling a baby straight from the tub; the hood cradles the baby's head while the pleats wrap the baby in fluffy softness. I found this towel and washcloth in the re-style section of Target on sale, and I already had the ribbon.
Supplies/Materials
I don't have a baby to model it, but I hope you get the picture. I will be linking this up at these fun parties.
Supplies/Materials
- 1 washcloth
- 1 towel
- Thread (preferably heavy duty)
- Accent ribbon
- Heavy duty needle
- Pin pleats into the towel. To make the first pleat, measure out 10 inches and mark with a pin. Fold the pin back so the pleat and the pin match up at 7 inches from the edge. Measure out 7 inches and mark with a pin; fold the pin back, so the pleat and the pin match up 4 inches from the previous pleat (repeat this pleat step).
- Repeat the process, so the bottom and top pleats match to create folds. Then repeat on the opposite side of the towel, so the pleats mirror each other on each side.
- Sew across the edge of the towel with a straight stitch, then reinforce the pleats by sewing again directly over the pleats.
- To make the hood, begin by folding back 3 inches of the washcloth on itself.
- Pin your accent ribbon over the fold, then sew in place about 1/8 of an inch from the edge of the ribbon.
- If you want a ruffle ribbon, use a long stitch length on your machine to baste a stitch down the center of your ribbon, then pull one thread to gather. Pin the ruffle to the hood over the other ribbon. Sew the ribbon down the center, then pull out the basted stitch.
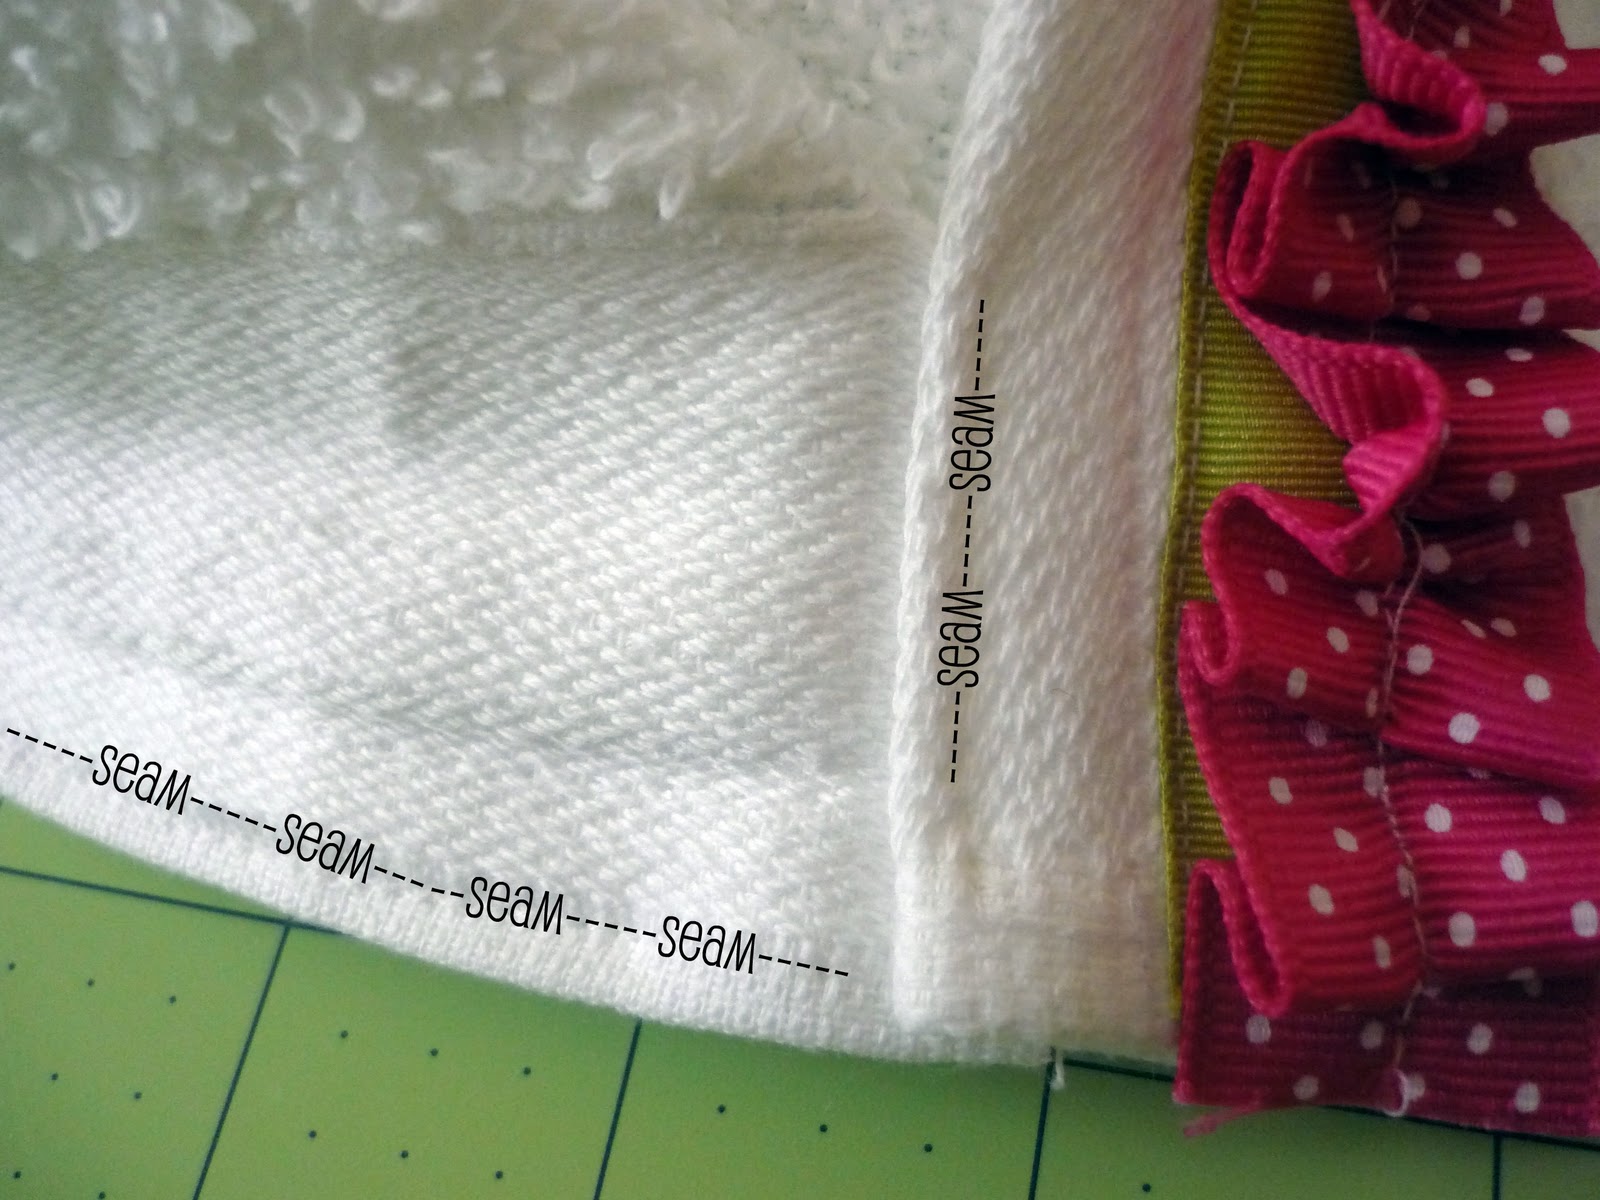
- Use a seam ripper to pull out the seam on the other end of the washcloth. Fold the washcloth in half like a rectangle. Cut off 1 inch from the corner. You will fold the corner into the lip left from the first fold you made. Pin in place.
- Sew a seam across the bottom of the hood, then about an inch up the lip to secure the corner you folded into it.
- Align the center of the towel with the center of the hood. (You will want both towel and hood to have the inside facing up)
- Pin the hood and the towel together. Then sew them together, making sure to reinforce your stitches. Your seam should enclose your ribbon ends, so they won't fray.
Wednesday, January 12, 2011
Tic-Tac-Toe Valentine
I love felt. I love that it is cheap. I love that it comes in so many rich colors. I love that you can poke small holes in it, and shortly thereafter they are practically non-existent. I love that felt doesn’t fray. I love, love, love, love felt.
When I was a kid, my mother made these valentines with my sister and me. They were fun to make, and play with later. This easy to make tic-tac-toe board is also a pocket to hold the pieces in. This would make a great addition to the diaper bag, or church bag for a quiet game to play. These are so fun and inexpensive, you will want to make them for all of your valentines this year. Maybe you will even want to host a Valentine’s Day party so that everyone can make and decorate their own.
Materials/Supplies
When I was a kid, my mother made these valentines with my sister and me. They were fun to make, and play with later. This easy to make tic-tac-toe board is also a pocket to hold the pieces in. This would make a great addition to the diaper bag, or church bag for a quiet game to play. These are so fun and inexpensive, you will want to make them for all of your valentines this year. Maybe you will even want to host a Valentine’s Day party so that everyone can make and decorate their own.
Materials/Supplies
- 2 pieces red felt
- 1 piece white felt
- 1 piece pink felt
- Scissors
- Sewing supplies (either a machine, or needle and thread)
- 5/8 inch thick pink ribbon
- Optional—yarn and large yarn sewing needle
- Cut a large heart out of one piece of red felt. I folded the felt in half and cut 1/2 a heart, so I would have two even sides.
- Place the cut heart on top of the other piece of red felt. Cut the second piece to match the heart.
- Now you need to make the tic-tac-toe board. I used a fatter stitch to make the four lines of the board. I just eyeballed where I wanted the lines to go, but you can measure for exact sizes. It will all depend on the size of your original hearts.***Let the kids do this part with a large needle and yarn. You could use a pencil to draw a line for them to sew along.***
- Using a 1/2” seam allowance, sew around the outside of both hearts leaving the top open for the pocket.
- Cut 5 small hearts out of the pink felt and 5 out of the white felt. I made a template from a scrap of red felt, then I cut all the other hearts to match. You will want the small hearts to fit between the lines of your tic-tac-toe board.
- I embellished the edge with the ribbon. I pinned the ribbon in between the two sides of the felt heart, and pleated as I pinned. Then I sewed around the edge again placing my presser foot on the edge of the original stitching.
- Decorate according to your supplies and tastes. I decided to sew little “x’s” and “o’s” along the opening for the pocket before I sewed the two pieces together.
- Place the small heart pieces inside your valentine and give to a loved one. (Take pictures of course, then email them to me, so I can show how you designed your own style)
Subscribe to:
Posts (Atom)