Pages Navigation Bar

Showing posts with label Guest Posting. Show all posts

Tuesday, August 30, 2011

Lace Stenciled Cupcakes {Guest Post from Katy at Sweet Verbena}

Don't look mom!  I'm serious!  This post includes powdered sugar!  My mom has an irrational fear of powdered sugar, which is perhaps why I have never seen this technique before.  I am excited to have Katy from Sweet Verbena here today for our last guest post of Cupcake Month. 

Hi there!
My name is Katy and I'm visiting from Sweet Verbena.


I'm a junior in college at Texas A&M university and when I'm not busy studying, I love to create. Hope you'll stop by my blog and say "Hi" sometime!


I am so excited to participate in cupcake month! Today I'll be sharing a technique rather than a recipe: Lace Stenciled Cupcakes! 


I purchased an 1/8 of yard of lace at Hobby Lobby and cut the strip into 12  squares. 


(If you want to make 24 cupcakes purchase 1/4 yard of lace)


It couldn't be more simple. Place a square of lace over the cupcake and generously sift Powdered sugar over the top. 


(Be sure to use a new square of lace for each cupcake)


Carefully remove the lace, 


and voila! A beautifully stenciled cupcake. 


Lovely, aren't they?


Thank you so much for having me Malory! I am loving all this cupcake fun this month at Snips and Spice. 

Thanks Katy!  These are so pretty!  This is a great option for those who are watching calories, or don't like frosting (I can't imagine who wouldn't, but still an option).  You know I LOVE frosting, and I am thinking that I could frost a cupcake, then use this same technique on top of the frosting.  These would make elegant cupcakes for a wedding, and be great on a hot day when the fats in frosting would melt.  Katy has posted some really cute sewing patterns, like this bow tie top.


and this dress.


She created this great tutorial on sewing a zippered lining into a bag (which you might find helpful with next month's sew-along bag).


Sneak over to Sweet Verbena to check out more sewing tutorials--she posted a great one just this week for reverse applique.

Monday, August 29, 2011

Plum Perfect Cupcakes {Guest Post from Tammy at Peppermint Plum}

I am so excited about today's post!  Tammy is one of my friends that I have known for years, and we actually started blogging about the same time.  Tammy and her sister Annie normally blog over at Peppermint Plum, but today Tammy is here sharing this new creation...Plum Perfect Cupcakes!

IMG_4898-1


 Hi! I’m Tammy from Peppermint Plum.
I’m here at Snips & Spice to share my recipe for


Plum-Perfect Cupcakes
Thanks to Malory (my friend IRL!) for the opportunity to share in this fun event!
I’ve been toying around with the idea of a plum cupcake for a while now, and decided this was the perfect chance to experiment.
I have to say that I think these turned out really tasty. They have a plumb-perfect blend of sweetness {from the frosting} and tartness {from the filling}.


You’ll need to plan ahead a little for this recipe…the plum sauce takes about 10 minutes to make and at least an hour to chill in the fridge before it is cool enough to use.

{Plum Perfect Cupcakes}
1 white cake mix
3 fresh plums
8 oz cream cheese
1 cube butter, room temp
3 Tbsp prepared plumsauce (see below)
1 tsp vanilla
7-8 cups powdered sugar (approx 2 lbs)
First, you will need to make your plumsauce filling. Cut fruit (with skin) from the pit of 3 fresh plums and process in a blender or food processor until the skins are chopped and blended in. Pour into small saucepan, and simmer for about 10 minutes, until the texture resembles that of applesauce.
IMG_4887


Pour into separate bowl and refrigerate for one to two hours, until sauce is cool to the touch. To speed up the process, stir sauce a few times while it is cooling.
IMG_4889


Next, preheat your oven and mix cake batter according to directions. Fill cupcake liners 1/2 full, and bake for about 15-17 minutes at 350. My mix made 30 cupcakes.
Allow cupcakes to cool.
Reserve about 3 tablespoons of cooled plumsauce to add to your frosting.


To fill cupcakes, pour remaining plum sauce into a pastry bag with a round tip, stick tip directly into the center of the cupcake, and squeeze a little sauce into each one.
filled cupcake 1
IMG_4904


Once filled, your cupcakes are ready for frosting.
This recipe makes a large amount of frosting, because I like to swirl big heaps of it onto my cupcakes. Feel free to halve the recipe if you don’t want as much on yours.
{Frosting}
Mix cream cheese, butter, 3 Tbsp plumsauce, and vanilla with hand mixer until well-blended. Slowly add powdered sugar one cup at a time until thick enough to pipe and hold up.
IMG_4898-1


Frost, Decorate, and Enjoy!


-Tammy


Thanks Tammy!  I cannot wait to try making this recipe!  You can see why Tammy and I are friends--just look at how much frosting she piled on that cupcake!  Tammy and Annie recently returned from a blogging break, and I can't wait to see what they have in store for us.  Some of my favorite posts from Tammy and Annie include their free printables like this one:


I am currently trying to take control of my health, and I always try to prepare veggies that look this appetizing.


I ooh and aah every time they post about home decor.  This kitchen is so beautiful and full of light (unlike my kitchen that feels like a black hole).


I also love the look of these keys.


Tammy also shares ideas for kids--like this slime.


Take a trip over to Peppermint Plum and search around; I promise you will find something there you like!

Friday, August 26, 2011

Marshmallow Surprise Cupcake {Guest Post from Jocelyn at Inside BruCrew Life}

When I first decided to host Cupcake Month here at Snips & Spice, I knew I had to ask Jocelyn from Inside BruCrew Life to come guest post.  I think Jocelyn is the cupcake queen!  She makes all sorts of delicious cupcakes with different fillings, flavors, and frostings.  I am so excited she wanted to participate, and I know you will not be disappointed with this recipe.


Hello Snips and Spice readers:-)

I'm Jocelyn from Inside BruCrew Life.  I have a huge sugar addiction and it shows up quite regularly in my blog posts.  If you come poke around some of my older posts, I guarantee you will leave wanting something sort of sugar substance!!  I am super excited to show off one of my cupcake creations here at Snips and Spice. 


I love a good cupcake, but I love hiding some sort of yummy candy or treat down inside the cupcake to surprise everyone.  I have had a bag of chocolate covered marshmallows hiding in my cupboard for quite some time now.  How they have survived this long without my sweet tooth finding them, I will never know:-)  I was wanting to try some sort of smore cupcake, but wanted it be slightly different.  I think it worked, what do you think?


Marshmallow Surprise Cupcakes
vanilla cake mix
vanilla wafers
chocolate covered marshmallows
1/2 c. chocolate chips
1 tbsp. butter

Preheat oven to 350*  Place liners in cupcake pan and set aside.  Mix up the cake mix according to the package directions.  Spoon 1 tbsp. batter into liners.  Place one vanilla wafer on top of that batter.  Now finish filling the liners 3/4 full of batter.  Bake for 8 minutes.  Very carefully open your oven door and push 3-4 of the chocolate covered marshmallows into the centers of every cupcake.  Close the oven door and finish baking for another 12-14 minutes.  As soon as the cupcakes come out of the oven, push 3-4 more marshmallows into the center.  Let cool completely.  Pipe on some butter cream goodness.  Melt the chocolate chips and butter in a microwave safe bowl for about 30-45 seconds.  Stir until smooth.  Drizzle over the tops of the cupcakes. 

Vanilla Butter Cream
1/2 c. butter
1/2 c. shortening
1/8 tsp. salt
1 1/2 tbsp. water
1 tbsp. vanilla
4 c. powdered sugar

Beat butter and shortening until creamy. Add the salt, water, and vanilla and cream again. Slowly add the powdered sugar. Add another 1-3 tbsp. water, beating after each one. You want the frosting to be creamy, but stiff enough to frost cupcakes.

Thank you so much Malory for inviting me to your cupcake month celebration.  It has been so much fun posting here today!

Thanks Jocelyn!  Another wonderful cupcake post from the cupcake queen herself!  Some of my favorites are as follows (Click the pictures to be taken to the recipe page):


Wednesday, August 24, 2011

Reese's Pieces Peanut Buttery Cupcakes {Guest Post by Kassi at Truly Lovely}

Today's feature is from my fun friend Kassie from Truly Lovely!  I am so excited about today's post because I never knew there was such a thing as butter pecan cake mix.  I am pretty sure I heard a chorus of angels singing when I read that little tidbit.  Keep reading to see how she used this cake mix...

Well hello there lovelies!!!
My name is Kassi and I blog over at Truly Lovely!
It's a blog about all things my sister and I consider to be.... lovely, of course!
To learn more about me and my blog, just clickity click this little button.


Truly Lovely

In the meantime, I am thrilled to be sharing a cupcake post in honor of Cupcake Month with you all here at Snips and Spice! 
Thanks SO much to Malory for inviting me over! 

OK! So my hubs isn't much for sweets. 
Kind of breaks my heart... Because I LOVE to bake!!!
But once in awhile I can find something he likes. 
One of his favorites, Reese's Pieces! What better way to incorporate Reese's Pieces into a dessert than with Reese's Pieces Peanut Buttery Cupcakes!!!


Ingredients Needed:

Butter Pecan Cake Mix
Muffin tin
Bag of Reese's Pieces
Cream Cheese Icing
Cupcake Liners
AND my special secret ingredient... Apple Sauce to substitute for the oil called for in the cake mix!
Makes the cupcakes more moist!

Mix up the cake mix according to the directions, substituting your cup of apple sauce for oil of course. 


Then to keep it real... Let me share my cooking FAIL
In a thin cake mix apparently... Reese's Pieces just SINK. 
They're too heavy for the light mix. 
SO instead of doing what I did and just trying to mix them into the cake mix...


Go ahead and fill your cupcake liners in your muffin tin with cake mix, then drop a few Reese's Pieces into each cupcake one at a time. 


This way, you get a few in each cupcake and NOT just a huge pile of Reese's Pieces at the bottom of your bowl... 
You live you learn, then you share it on your blog so others don't have to! ;)

Bake according to directions on the box and viola!
Yummy cupcakes! 


And my new icing technique... 
Saves time from just using a butter knife or spatula...
Cut off a corner of a ziploc baggy, fill with icing and go to town!!


Then of course display on your new cake plate! ;)

Happy Baking Lovelies! 
Hope you'll pop over to Truly Lovely to say hello! 
Thanks again Malory for having me over!!!


Thanks Kassi!  Yum.  I can sympathize with her about husbands who don't like sweets.  Kassi blogs about all sorts of fun stuff.  She made these cute tote bags--you know how I love bags.


She also made these delicious smores in a pan.  I have been thinking about a smores bar for a few months, and these look delish!


Stop by on Friday for her link party Fancy This Friday.

Fancy This


Tuesday, August 23, 2011

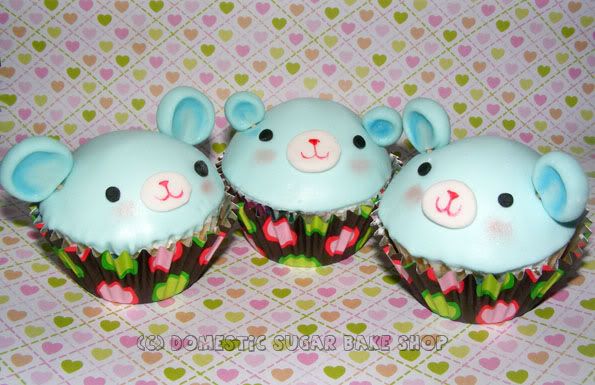
Cuppy Bear {Guest Post by Meghan at Domestic Sugar Bake Shop}

Today's cupcake is super cute!  I can't get over how ridiculously cute these cuppy bears are!  Meghan from Domestic Sugar Bake Shop is here to show you how to make one.

Hello Everyone
Meghan from Domestic Sugar here!


I love creating special treats that are both beautiful and edible. I am super excited to be able to participate in Cupcake Month with all these crazy good cuppy artists! Cupcakes (hereafter known as Cuppies) are the most adorable dessert. What privileged child does not have a great memory of eating a cuppy that was super crazy delicious. I remember going to a party once, to see these MONSTER cuppies with a ring of chocolate sprinkles and a crazy beautiful sugar flower in the center.

Anyway, this is my little addition to the party. I made these cuppies for my niece and nephew whom I love super lots!
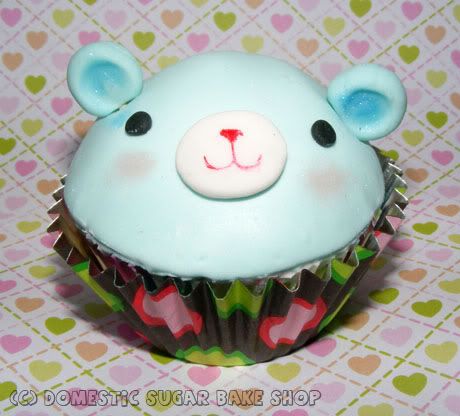
ENTER THE CUPPY-BEAR!


So, what will you need to make these cuties?
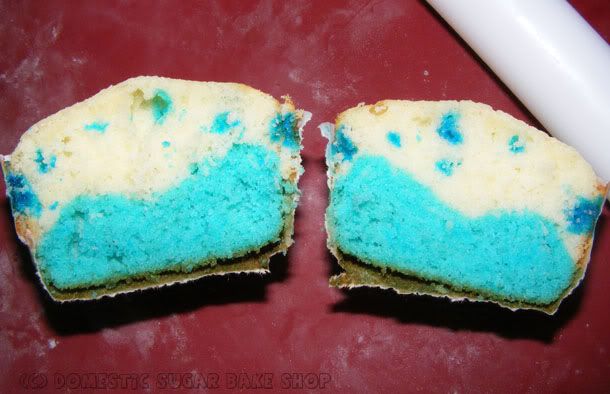
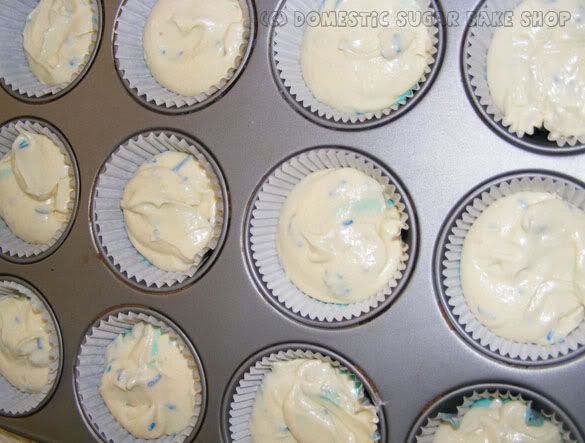
You will need to make some cuppies. Since these are cuppy-bears and they are blue, and it is raining (three reasons), I made some rainy insides:


To make the rain puddle insides, follow these directions, or just skip ahead to the Cuppy-bear part.

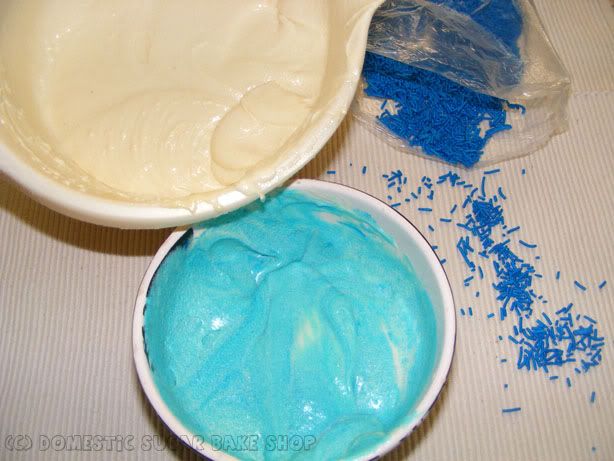
First, make a batch of your favorite Vanilla / White cake. It does not matter if it is from a box or from scratch. Take about One Cup of the mix out and dye it blue, leave the rest white. You will also need some Blue Jimmies (sprinkles) but I'll show you why in a bit.


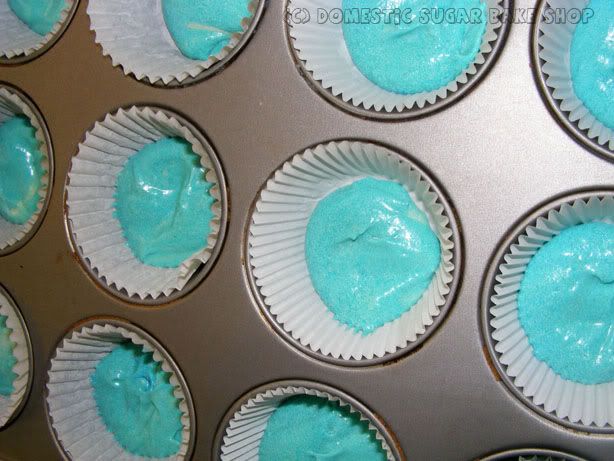
In your cuppy liners, fill the bottom 1/4 with the blue and spread it all about the bottom so as to cover it.


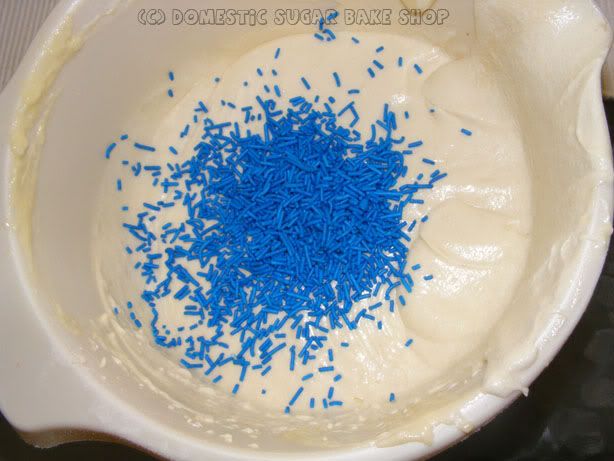
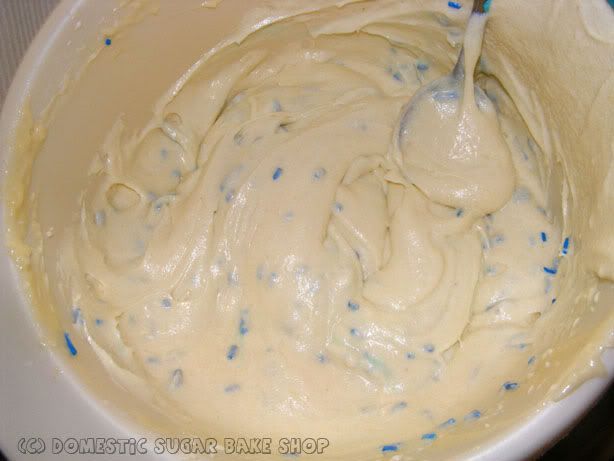
Now, go back to the white mix, and take about 1/3c of Jimmies and add it in. Stir lightly. Jimmies can bleed a little if over-mixed, so make sure you only stir enough to mix in.

Like so:


Now, fill the wrappers on top of the blue (3/4 to the top), and bake 'em as usual.


While those are baking, go to the decorating phase.
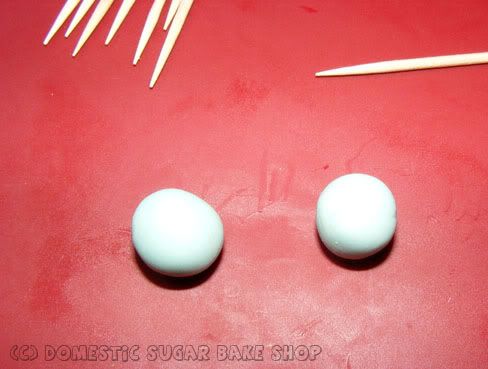
Take some gum-paste (any colour) and roll them into small balls. Try to keep them about the same size and not too big. These will make the ears of the bear.

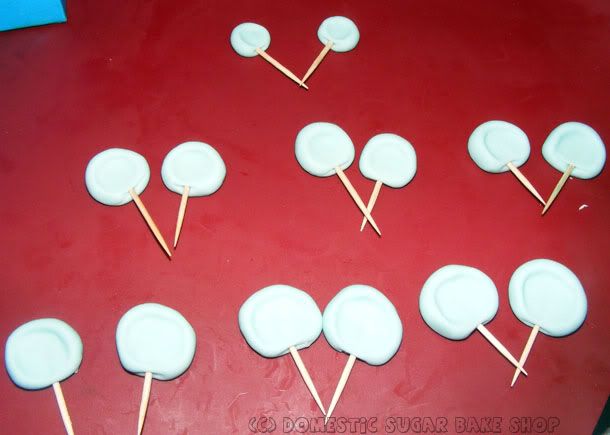
To make good ears, poke toothpicks into the bottom of the cuppy and then squash the center of the ear down with your finger. This will indent the ear, flatten it, and set the toothpick in.


Sets of Ears? CHECK!
Let those dry while the cuppies bake/while you get fondant and icing ready.

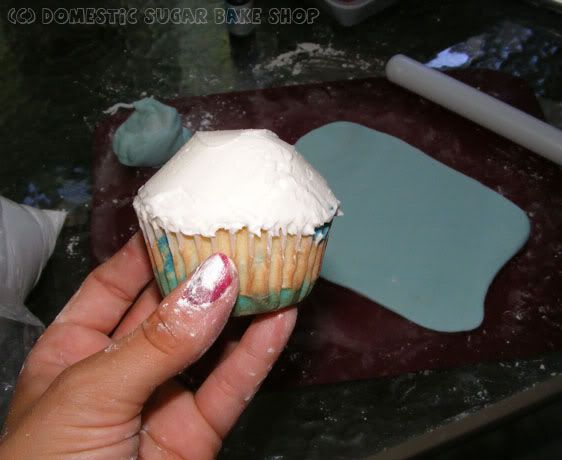
When the cuppies are done, and cool. Take your icing (whatever you choose), and using a butterknife, create a dome on the top! Make it as smooth as possible.


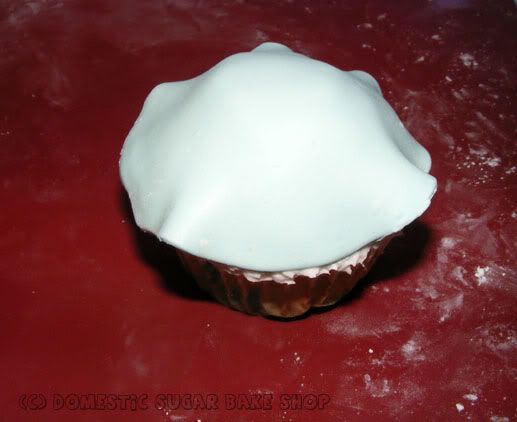
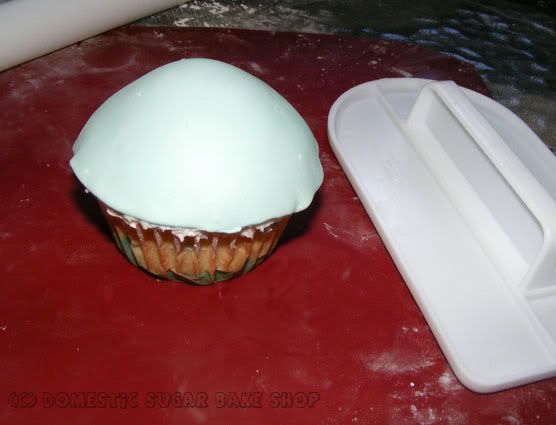
Now, roll out your fondant, and using a large circle-cookie-cutter, cut a circle of fondant. Lay the fondant on the the cuppy and begin to smooth it out.


I like to use a fondant smoother. Get them as smooth as possible and then fold down the edges (not shown).


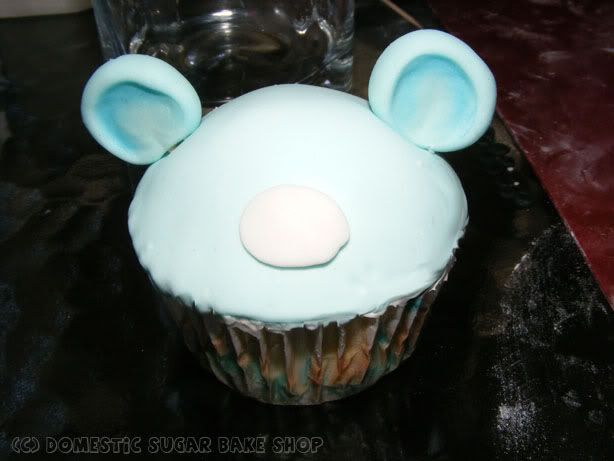
Now, pick in the ears:

Then using bits of gumpaste or fondant, roll out a middle oval for the nose. Secure it with a little water:


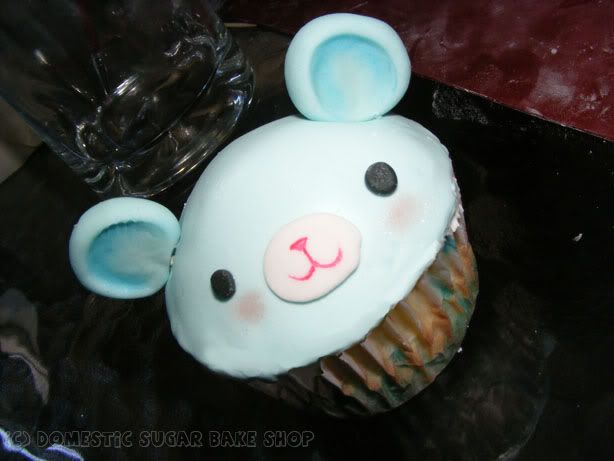
Next, with extra fondant or gumpaste, add on eyes. You could also just draw on the eyes.


Finally, add on the smile with a little foodcolor and water. I paint it on with a paint brush. If you have food-grade luster dust, you can even give the bear rosy cheeks and shade in the ears.

SHE'S ALL DONE. Man, that was easy right?


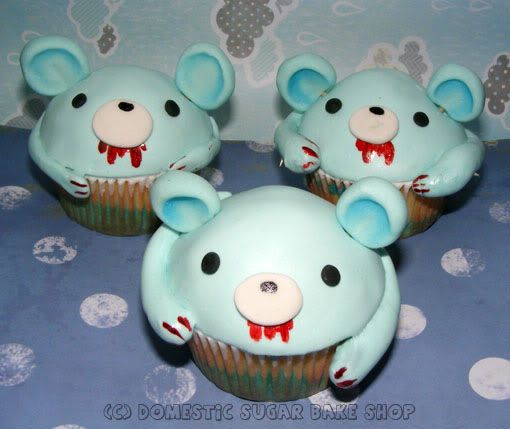
This idea could be used for other things, like a GLOOMY-BEAR FOR EXAMPLE:


I know, Gloomy Bear is supposed to be Pink.... Oh well! I just wanted to play.
If you wish to add in arms, just roll out some extra fondant or gumpaste and glue it down with dabs of water.


And now you know how to make an awesome Cuppy-Bear (or an even more rocking GLOOMY CUPPY-BEAR).

I hoped you all enjoyed the Tutorial. To see more, check out the blog:
http://domesticsugar.blogspot.com/
or
Google: DOMESTIC SUGAR BAKE SHOP


I hope you all enjoyed the LONG tutorial as much as I did making it.
Until then!

Thanks Meghan!  My sister-in-law (Teri) loves Hello Kitty, so she will be super excite to see this today (that's what gloomy bear is from).  I first fell in love with Meghan's gorgeous cookies.  Some cute ones she made recently are these dinosaur heart cookies.


Just the other day, I saw this post for making a gumpaste anemone.  I think Meghan and Teri would make perfect friends because this is the flower that Teri wanted on her wedding cake.  At the time, I had no idea how to make them, so she settled for some other flowers (yes I feel a little like a failure--I hope she has forgiven me).  Isn't it gorgeous?  If you want to know how to make one, click here.


Anyone who likes cookies, cake, or decorating these delicious treats seriously needs to start following Meghan.