Pages Navigation Bar

Showing posts with label Cake. Show all posts

Thursday, June 21, 2012

Carrot Cake Favorite


Most of the cakes I make are variations of my basic cake recipe, but this recipe I adapted from my fan-favorite zucchini cake.  Just so you know--I am going to do some shameless bragging about this recipe.  Feel free to skip the rest of this self-gratuitous paragraph.  This is one of the best cakes, and hands down the best carrot cake, I have ever tasted.  As many of you know, Adam is not generally a fan of sweets, but he snuck a cupcake and a mini cupcake before I could take pictures.  This cake pleased everyone from the ninety-five-year-old Grandma, whose birthday we celebrated, all the way down to the toddlers.

Ok.  I'm done now.  Let's get to the recipe.


Cake Ingredients
  • 3 Cups all-purpose flour
  • 2 Cups dark brown sugar
  • 1 teaspoon salt
  • 1.5 teaspoons baking soda
  • 1 teaspoon baking powder
  • 1 Tablespoon cinnamon
  • 1 Tablespoon vanilla
  • 4 eggs
  • 3/4 Cup vegetable oil
  • 3 Cups grated carrots
  • 1/2 Cup golden raisins
  • 1/2 Cup black (I'm not sure what these are called) raisins
  • 1 Cup crushed walnuts

Frosting Ingredients
  • 8 oz cream cheese
  • 1 Cup (2 sticks) butter - this makes a more buttery cream cheese frosting; if you really like cream cheese, use just one stick of butter
  • 2-3 Cups powdered sugar
  • 1 Tablespoon vanilla

Mix and Bake (for tips on baking see this post)
  1. Preheat oven to 325 degrees F
  2. Sift together the flour, baking soda, baking powder, cinnamon, and salt together into medium mixing bowl
  3. Combine brown sugar and dry mixture in large mixing bowl--mix well
  4. Beat together the eggs and oil in the small mixing bowl
  5. Add egg and oil mixture to large mixing bowl--add vanilla while mixing these ingredients together (DO NOT OVER-MIX)
  6. Your batter at this point will be sort of stiff and sticky like a dough
  7. Add carrots, raisins, and nuts, and mix until dispersed--the batter becomes much more moist and like a batter
  8. Spray pan with baking spray, and pour batter into pan (use spatula to scrape out mixing bowl)
  9. Bake at 325 degrees F for 50 minutes (cupcakes take much less time: about 12-15 minutes for minis and 18-22 for regular)
  10. Place pan on cooling rack for 15 minutes
  11. Turn cake out onto rack to finish cooling

Mix Frosting (for frosting tips see this post)
  1. After putting cake in oven, remove cream cheese and butter from fridge to soften 
  2. Cream together butter and cream cheese
  3. Add powdered sugar to frosting mixture and mix well; add enough sugar so that it tastes delicious and is stiff enough to hold whatever shape you are going for
  4. Mix vanilla into frosting
  5. When cake is cool, stack, frost, and decorate


Tuesday, June 19, 2012

Sesame Street Cupcakes

I made these cupcakes for a first birthday party last spring.  I couldn't believe how fun and easy these were to whip up.

If you have been reading along for a while, you will know that I already prefer to buy my frosting from the bakery at King Soopers (Kroger stores).  The frosting is less expensive to make than buttercream, is perfectly white, doesn't need refrigeration, has a great consistency, and has a great flavor.  The time saved is also a bonus.

The morning I was making these, I was really running late on time, and I found out that the bakery will sell the colored frosting as well as white.  The colored frosting is more expensive, but the amount of food coloring required to get these rich colors probably about equals the extra cost (I haven't actually done the math, but this past year I have been more short on time than money, so I am willing to go with my estimate).

Here's what you'll need:

  • cupcakes (I used my basic recipe)
  • red frosting for Elmo
  • blue frosting for Cookie Monster
  • white frosting for eyes
  • black frosting for eyes and mouth (I used the stuff from the shelf that comes in a can with attachable tips) ***I would probably use black fondant cut into shapes in the future***
  • 3 piping bags (one for red, one for blue, one for white)
  • star piping tip
  • large circle piping tip
  • orange jelly beans (M&M's might work as well)
  • mini chocolate chip cookies
For Cookie Monster:
  1. Start with a plain cupcake.
  2. Cut your mini cookies in half.  They don't need to be exact.
  3. Use the star tip in a piping bag to frost the cupcakes.  You should pipe in a back and forth motion from the center to the outside, moving around the cupcake, to create the furry look.  This is not an exact science; in fact, the more random you make it, the better it looks.
  4. Use the circle tip in a piping bag to make large dots of white frosting for the base of the eyes.
  5. Use the circle tip of the black frosting to make smaller dots on the eyes.  Cookie Monster's eyes should both be looking different directions (often each looking out).  ***I would use small black fondant circles next time***
  6. Stick a cookie half in for the mouth.  It's ok if there are crumbs around the mouth; Cookie Monster is a messy eater.
For Elmo:
  1. Start with a plain cupcake (this isn't its own step because it wouldn't have looked as good in the collage-ha ha). Use the star tip in a piping bag to frost the cupcakes.  You should pipe in a back and forth motion from the center to the outside, moving around the cupcake, to create the furry look.   This is not an exact science; in fact, the more random you make it, the better it looks.
  2. Use the circle tip in a piping bag to make large dots of white frosting for the base of the eyes.
  3. Use the circle tip of the black frosting to make smaller dots on the eyes and the curve of the mouth.  ***I would use small black fondant circles and black fondant crescents next time***
  4. Stick a jelly bean in for the nose.  I poked the long side in to create a circle nose instead of an oval--the oval looked more like Gonzo's nose.
Mini Cupcake Variation - I made these cute mini cupcakes with the extra batter and supplies; you know I am a sucker for mini cupcakes.  The basic technique is the same, but you use a smaller chunk of cookie for Cookie Monster's mouth, and cut the jelly bean in half for Elmo's nose.

Monday, June 18, 2012

Steve and Judy's Surprise Wedding Cake

Last month my father-in-law got married, and I made this wedding cake for the occasion.  It was a simple, but delicious, white chocolate cake with vanilla buttercream frosting.  I used my basic cake recipe, and the frosting techniques found here.  Since I didn't cover this cake with fondant, after I frosted each tier, I wet the spatula to smooth the frosting.  I used a medium round tip to make the pearl border at the bottom of each tier.

The flowers are colored fondant.  To make these, roll out the fondant to about 1/8 inch thick, then cut with a flower shaped cutter.  Place the flowers on a sponge and press in the middle of the flower with a small dowel (I used the back of a small paint brush) to give the flowers dimension.  Let the flowers dry overnight.  Use a small dot of frosting to glue each flower to the cake.

Oh, I almost forgot to tell you...there's something else you might want to know about this cake.  Just one part of the surprise.  Are you ready?  Can you guess what the secret is???

It's only 6 inches tall!  Steve and Judy got married in Estes Park without a reception, so Adam and I brought them this cake as a surprise.  I had so much fun making this tiny cake.  I used a 6 inch pan, a 4 inch pan, and a 2 inch pan.  Seriously, how cute is this cake?


So the question is...could you tell?

Tuesday, June 12, 2012

Cupcake Toppers in ... 1 - 2 - 3

I have to confess that I am generally not a fan of cupcake toppers.  It is the snobby cake decorator in me that wants everything on a cake (or cupcake) to be edible.  Last year, when the craze for cupcake toppers hit, I was less than thrilled.  I like to expend creative energy on edible decorations.

However, I finally gave in.  Last August, my niece and nephew had a superhero birthday party.  They wanted cupcakes with "the little toothpick things" as the 3/4 year old described them.  I was walking down the kids craft aisle of the craft store, when I saw these foam stickers, and...BAM I knew what I was going to do.  I grabbed a bag of the stars, a paint pen, and headed to the checkout.

When I got home, I couldn't wait to get started.  I used the white paint pen, and a fine black sharpie to write on the foam stars.  I wrote superhero words like "bam," "pow," and "zap."  I also added a few "happy birthday's" and many letter "m's" for their names.  The stars already came with that fantastic border, so no other decoration necessary.  When I was done, I had a pile of stickers that looked like this:


To construct the topper all I had to do was pull the back off the foam stickers, and place a toothpick between two stickers (sticky sides together).

Stick in a cupcake, and you are ready to go!  How easy was that?  I used the "Grasshopper" (mint chocolate) cupcakes from this post, and chocolate cupcakes with strawberry icing.

Sunday, June 10, 2012

Tausha's Wedding Cake


Hello again!  How have you been?  I know...I know...it has been a long time.  This past year was the most difficult of my teaching career so far, but it is summer once again, and I am ready to hit the ground running here at Snips and Spice (not literally running--I hate running).  Although I was too busy to blog, I have been busy cooking, caking, and crafting.  Over the next few weeks, I will be posting many of the projects I worked on over the last nine months, and working on new projects to share with you as well.

One of the things keeping me busy these past months has been cakes.  It got really crazy around Christmas with two weddings (one of which was my sister's).  The week before Christmas entailed this three-tier wedding cake, about 85 cupcakes, and the birthday cake for the bride's father.

Although the cake looks complicated, it was actually pretty easy to decorate.  I covered the cake with fondant, then piped the decorations on the side--see this post for frosting cakes, and this post for covering cakes with fondant.  To transport the cake, I boxed each tier individually. 

Most of the cakes I make do not have space between the tiers, so I use cardboard bases for each tier.  For this cake, I used Wilton'sstackable square cake bases for the top two tiers, and a foil-covered square for the bottom of the cake.  The stackable bases click into place with the columns--creating a stable cake that will last throughout the day.  This was the first time I had used this type of construction, and I couldn't believe how easy it was.  I used a dab of frosting to secure the ribbons in place around the base of each tier after I stacked them.

My friend Pam helped me cut the fruit and dab it on paper towels to keep the juices from dripping on, and melting, the fondant.  The cut fruit and flowers quickly filled the gaps between the tiers and completed this cake.

The twelve-inch bottom tier of the wedding cake was comprised of four layers of red velvet cake with cream cheese frosting.  The ten-inch center tier was four layers of lemon poppyseed cake with vanilla buttercream, and the eight-inch top tier was white chocolate cake with white chocolate raspberry filling.  I used my basic cake recipe for these cakes found in this post about baking beautiful, delicious cakes.
I made the cupcakes with the same flavors as the cake tiers.  I simply colored the frosting to match the wedding colors; see my post about food coloring here.  There are so many different cupcake holders, cupcake wrappers, cake stands, and candy to decorate with right now, that you can easily create whatever look you want.
This particular wedding was a little different because it took place on the bride's father's birthday.  Father of the bride is a man who loved apple and had a deep respect for Steve Jobs, so what could be better than a surprise Apple birthday cake at the reception?  You may not be able to tell from the picture, but the apple cake was the size of a large apple.  My sister helped me create the iPod out of fondant.

Thanks for visiting!  I hope you come back this week to see what else I have been up to.

Wednesday, August 24, 2011

Reese's Pieces Peanut Buttery Cupcakes {Guest Post by Kassi at Truly Lovely}

Today's feature is from my fun friend Kassie from Truly Lovely!  I am so excited about today's post because I never knew there was such a thing as butter pecan cake mix.  I am pretty sure I heard a chorus of angels singing when I read that little tidbit.  Keep reading to see how she used this cake mix...

Well hello there lovelies!!!
My name is Kassi and I blog over at Truly Lovely!
It's a blog about all things my sister and I consider to be.... lovely, of course!
To learn more about me and my blog, just clickity click this little button.


Truly Lovely

In the meantime, I am thrilled to be sharing a cupcake post in honor of Cupcake Month with you all here at Snips and Spice! 
Thanks SO much to Malory for inviting me over! 

OK! So my hubs isn't much for sweets. 
Kind of breaks my heart... Because I LOVE to bake!!!
But once in awhile I can find something he likes. 
One of his favorites, Reese's Pieces! What better way to incorporate Reese's Pieces into a dessert than with Reese's Pieces Peanut Buttery Cupcakes!!!


Ingredients Needed:

Butter Pecan Cake Mix
Muffin tin
Bag of Reese's Pieces
Cream Cheese Icing
Cupcake Liners
AND my special secret ingredient... Apple Sauce to substitute for the oil called for in the cake mix!
Makes the cupcakes more moist!

Mix up the cake mix according to the directions, substituting your cup of apple sauce for oil of course. 


Then to keep it real... Let me share my cooking FAIL. 
In a thin cake mix apparently... Reese's Pieces just SINK. 
They're too heavy for the light mix. 
SO instead of doing what I did and just trying to mix them into the cake mix...


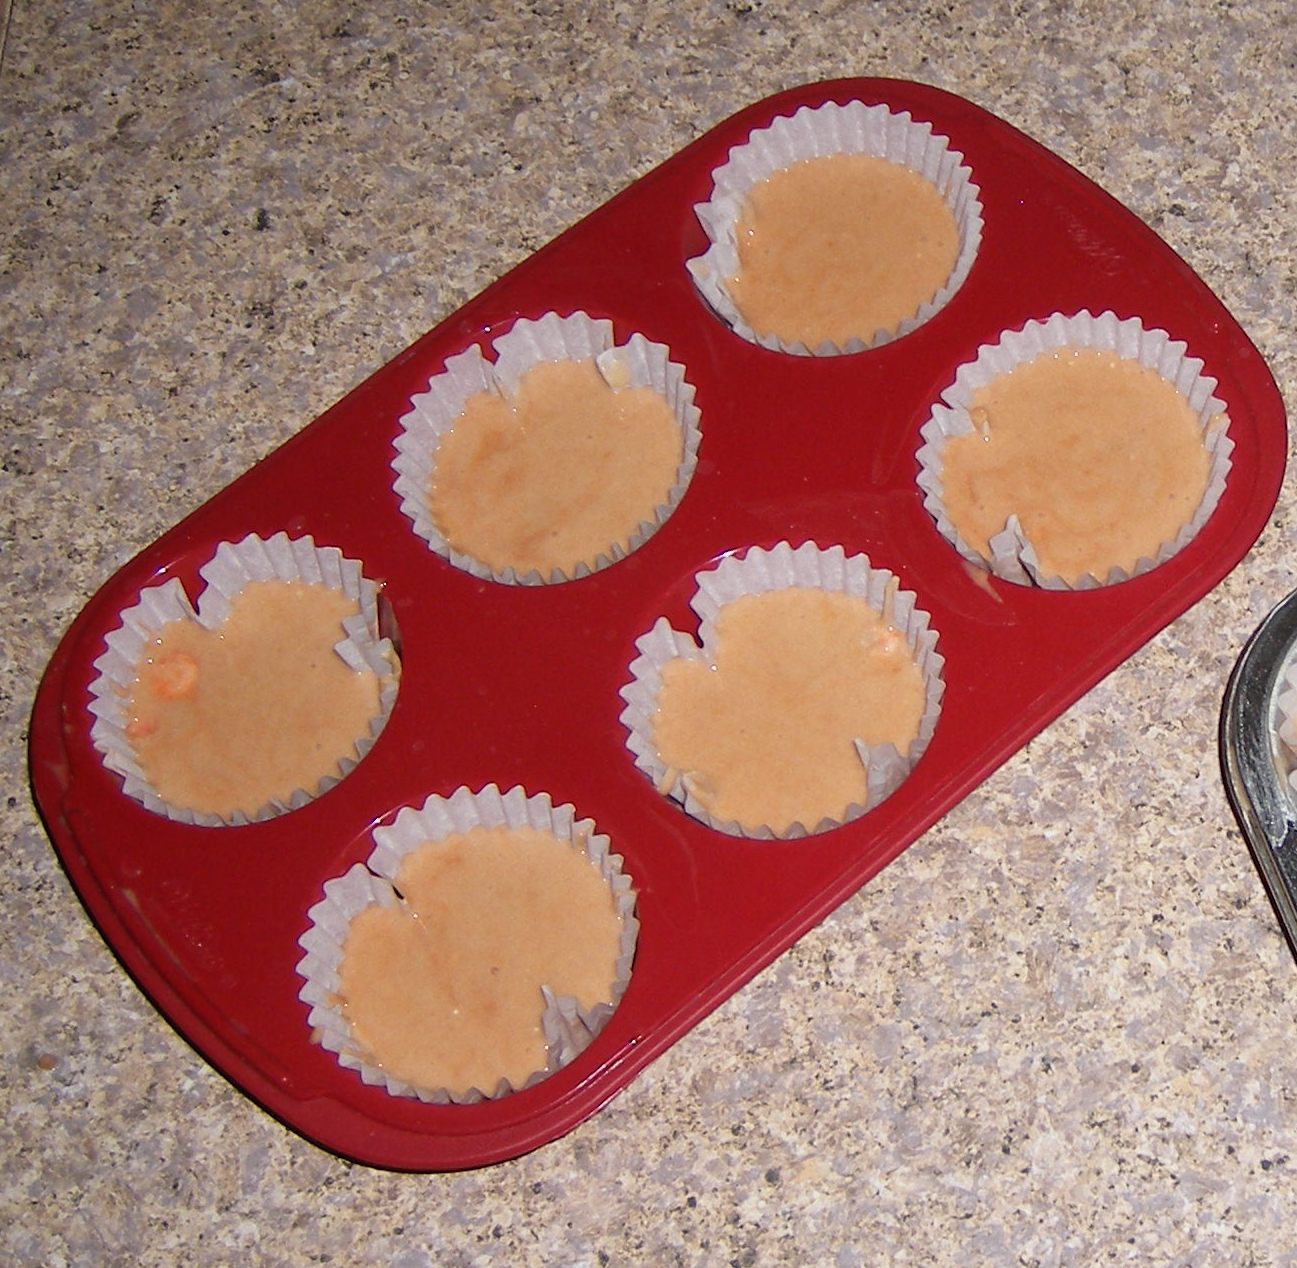
Go ahead and fill your cupcake liners in your muffin tin with cake mix, then drop a few Reese's Pieces into each cupcake one at a time. 


This way, you get a few in each cupcake and NOT just a huge pile of Reese's Pieces at the bottom of your bowl... 
You live you learn, then you share it on your blog so others don't have to! ;)

Bake according to directions on the box and viola!
Yummy cupcakes! 


And my new icing technique... 
Saves time from just using a butter knife or spatula...
Cut off a corner of a ziploc baggy, fill with icing and go to town!!


Then of course display on your new cake plate! ;)

Happy Baking Lovelies! 
Hope you'll pop over to Truly Lovely to say hello! 
Thanks again Malory for having me over!!!


Thanks Kassi!  Yum.  I can sympathize with her about husbands who don't like sweets.  Kassi blogs about all sorts of fun stuff.  She made these cute tote bags--you know how I love bags.


She also made these delicious smores in a pan.  I have been thinking about a smores bar for a few months, and these look delish!


Stop by on Friday for her link party Fancy This Friday.

Fancy This


Tuesday, August 23, 2011

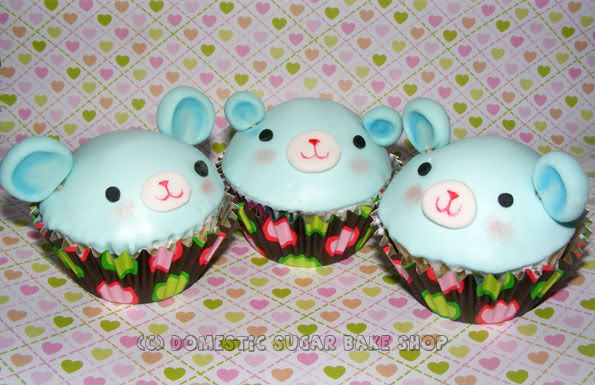
Cuppy Bear {Guest Post by Meghan at Domestic Sugar Bake Shop}

Today's cupcake is super cute!  I can't get over how ridiculously cute these cuppy bears are!  Meghan from Domestic Sugar Bake Shop is here to show you how to make one.

Hello Everyone
Meghan from Domestic Sugar here!


I love creating special treats that are both beautiful and edible. I am super excited to be able to participate in Cupcake Month with all these crazy good cuppy artists! Cupcakes (hereafter known as Cuppies) are the most adorable dessert. What privileged child does not have a great memory of eating a cuppy that was super crazy delicious. I remember going to a party once, to see these MONSTER cuppies with a ring of chocolate sprinkles and a crazy beautiful sugar flower in the center.
Anyway, this is my little addition to the party. I made these cuppies for my niece and nephew whom I love super lots!
ENTER THE CUPPY-BEAR!


So, what will you need to make these cuties?
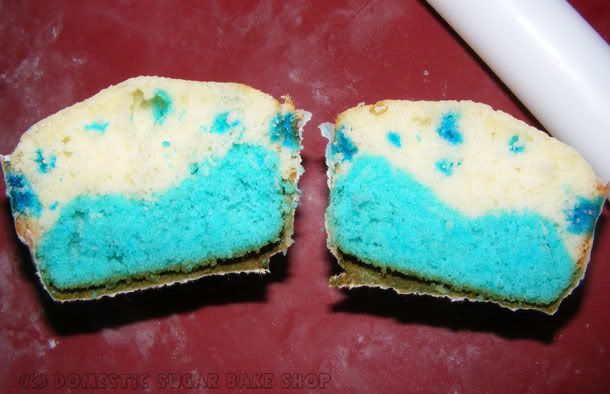
You will need to make some cuppies. Since these are cuppy-bears and they are blue, and it is raining (three reasons), I made some rainy insides:


To make the rain puddle insides, follow these directions, or just skip ahead to the Cuppy-bear part.

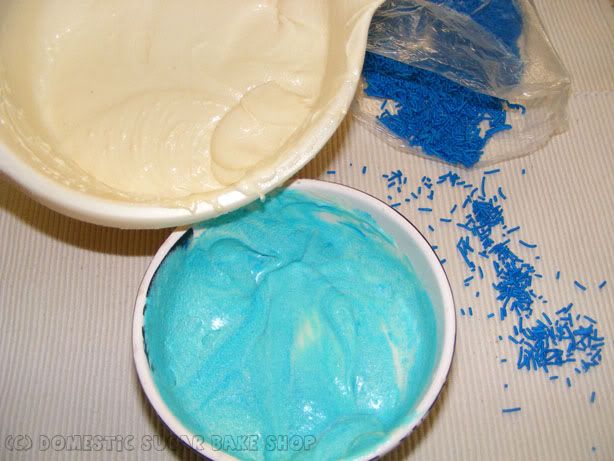
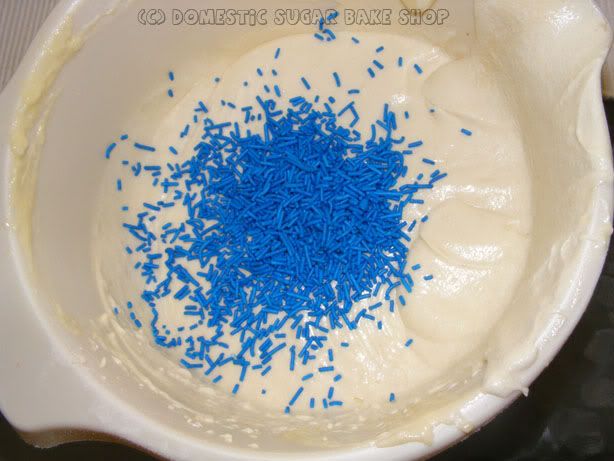
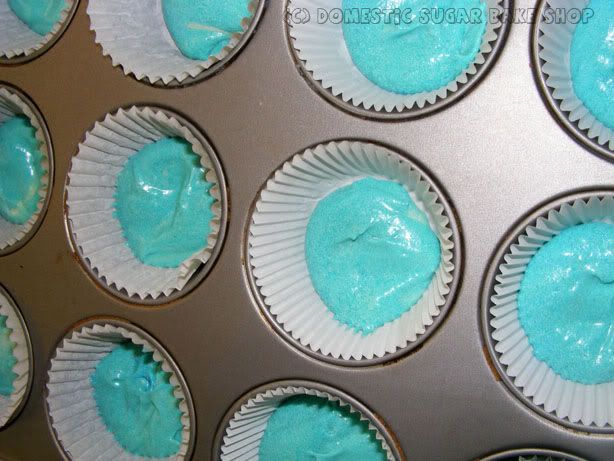
First, make a batch of your favorite Vanilla / White cake. It does not matter if it is from a box or from scratch. Take about One Cup of the mix out and dye it blue, leave the rest white. You will also need some Blue Jimmies (sprinkles) but I'll show you why in a bit.


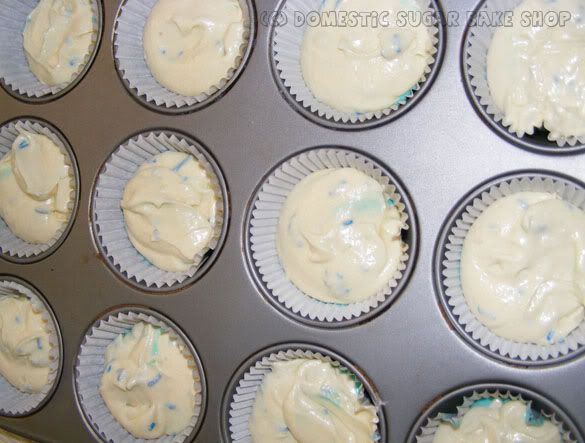
In your cuppy liners, fill the bottom 1/4 with the blue and spread it all about the bottom so as to cover it.


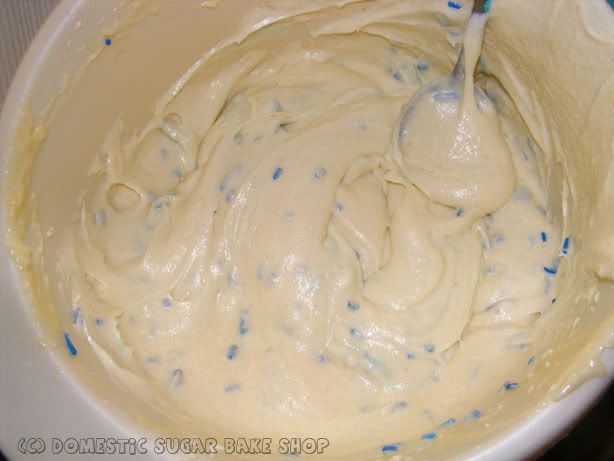
Now, go back to the white mix, and take about 1/3c of Jimmies and add it in. Stir lightly. Jimmies can bleed a little if over-mixed, so make sure you only stir enough to mix in.

Like so:


Now, fill the wrappers on top of the blue (3/4 to the top), and bake 'em as usual.


While those are baking, go to the decorating phase.
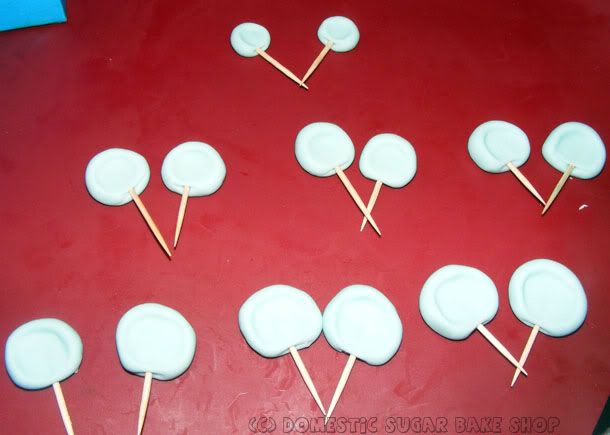
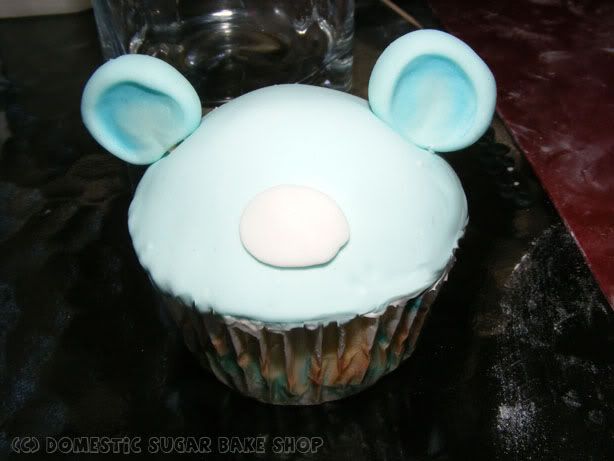
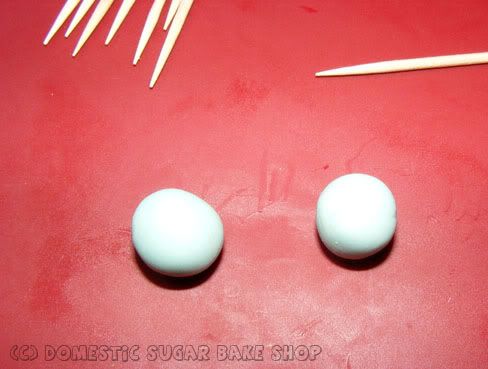
Take some gum-paste (any colour) and roll them into small balls. Try to keep them about the same size and not too big. These will make the ears of the bear.

To make good ears, poke toothpicks into the bottom of the cuppy and then squash the center of the ear down with your finger. This will indent the ear, flatten it, and set the toothpick in.


Sets of Ears? CHECK!
Let those dry while the cuppies bake/while you get fondant and icing ready.

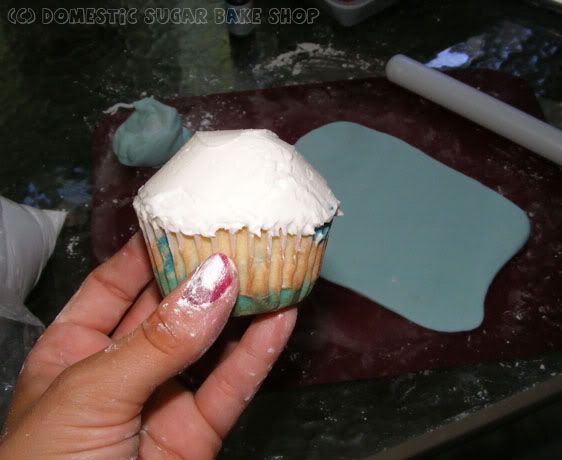
When the cuppies are done, and cool. Take your icing (whatever you choose), and using a butterknife, create a dome on the top! Make it as smooth as possible.


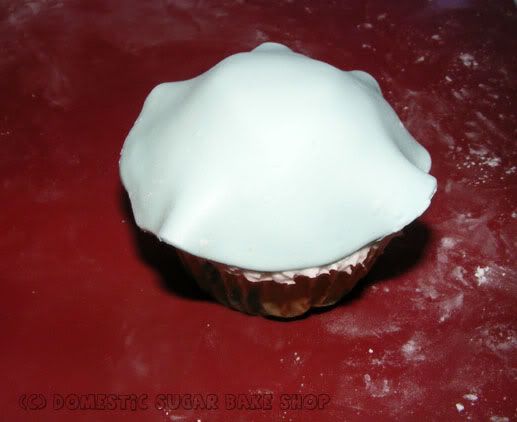
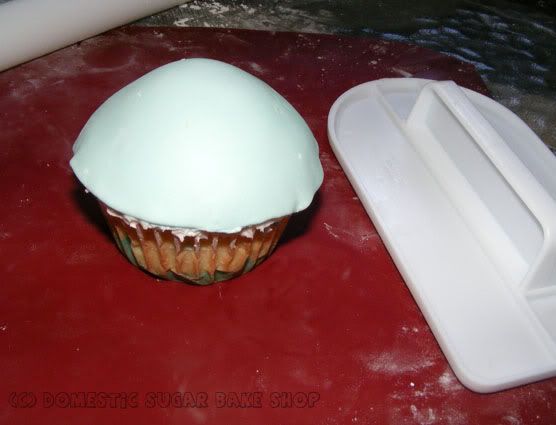
Now, roll out your fondant, and using a large circle-cookie-cutter, cut a circle of fondant. Lay the fondant on the the cuppy and begin to smooth it out.


I like to use a fondant smoother. Get them as smooth as possible and then fold down the edges (not shown).


Now, pick in the ears:

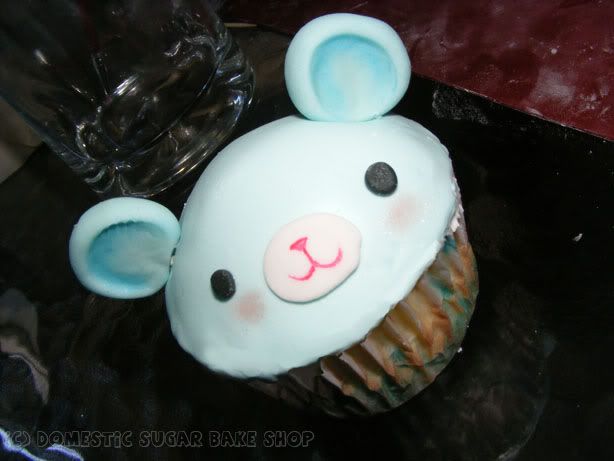
Then using bits of gumpaste or fondant, roll out a middle oval for the nose. Secure it with a little water:


Next, with extra fondant or gumpaste, add on eyes. You could also just draw on the eyes.


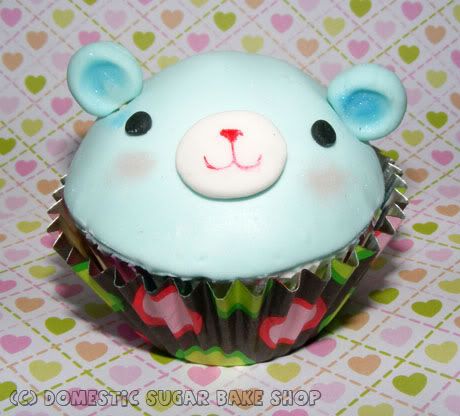
Finally, add on the smile with a little foodcolor and water. I paint it on with a paint brush. If you have food-grade luster dust, you can even give the bear rosy cheeks and shade in the ears.

SHE'S ALL DONE. Man, that was easy right?


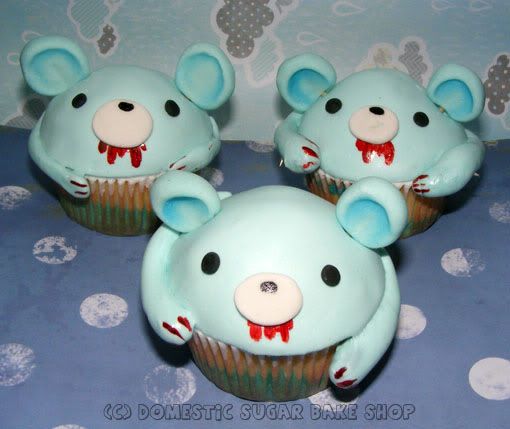
This idea could be used for other things, like a GLOOMY-BEAR FOR EXAMPLE:


I know, Gloomy Bear is supposed to be Pink.... Oh well! I just wanted to play.
If you wish to add in arms, just roll out some extra fondant or gumpaste and glue it down with dabs of water.


And now you know how to make an awesome Cuppy-Bear (or an even more rocking GLOOMY CUPPY-BEAR).

I hoped you all enjoyed the Tutorial. To see more, check out the blog:
http://domesticsugar.blogspot.com/
or
Google: DOMESTIC SUGAR BAKE SHOP


I hope you all enjoyed the LONG tutorial as much as I did making it.
Until then!

Thanks Meghan!  My sister-in-law (Teri) loves Hello Kitty, so she will be super excite to see this today (that's what gloomy bear is from).  I first fell in love with Meghan's gorgeous cookies.  Some cute ones she made recently are these dinosaur heart cookies.


Just the other day, I saw this post for making a gumpaste anemone.  I think Meghan and Teri would make perfect friends because this is the flower that Teri wanted on her wedding cake.  At the time, I had no idea how to make them, so she settled for some other flowers (yes I feel a little like a failure--I hope she has forgiven me).  Isn't it gorgeous?  If you want to know how to make one, click here.


Anyone who likes cookies, cake, or decorating these delicious treats seriously needs to start following Meghan.