Pages Navigation Bar

Showing posts with label Coconut. Show all posts

Wednesday, August 17, 2011

Pina Colada Cupcakes {Guest Post from Ashley at Eisy Morgan}

Today's recipe is a great low-fat option, and a great recipe for non-bakers.  Ashley from Eisy Morgan found this recipe on Skinny Taste and tried it out. 


Hi!! I’m Ashley
me2011 026

and I run a little blog called

But I must admit I don’t add many recipes to my blog as it is far from my forte!  That is why I was excited to participate in Malory’s cupcake series as I had been wanting to try some new recipes. These cupcakes are TO DIE FOR and great for summer!

I found the recipe on one of my favorite foodie blogs Skinny Tasteand had to try them!!
{She has amazing recipes and every one I have tried is yummy and she has the Weight Watchers points calculated as well}


Here is all you will need for the cupcakes:
june 009

18.25 oz box yellow cake mix (I used Betty Crocker Super Moist)
20 oz can crushed pineapple in juice  (do not drain)
june 010

june 012

june 011

Just mix these ingredients together in a bowl and pour into cupcake papers and bake to cakes instructions. (No oil or egg required!) I also couldn’t find crushed pineapple so I used the regular canned pineapple and they had large chunks in them, which I enjoyed!

And for the frosting:
8 oz Philadelphia 1/3 less fat cream cheese
20 oz can crushed pineapple in pineapple juice, completely drained of any liquid
1 cup sweetened coconut flakes
1/4 cup sugar


I placed my frosting in the fridge to thicken a bit (or the freezer if you are in a hurry)

They are so simple and so yummy if you love pineapple and coconut!!
Check out Gina’s full (more beautiful) recipe HERE
ENJOY!!

Thanks for sharing this great find Ashley!  I have been thinking about a pina colada recipe, but never thought of using pineapples instead of oil and eggs.  Ashley doesn't usually blog about food, as she stated earlier, but she does blog about blog design, blogging, crafts, hair, and beauty.  She truly is a multi-faceted woman.  If you are interested in growing your blog, head over to Eisy Morgan--Ashley is a pro!

Friday, August 5, 2011

Eggless Chocolate Banana Coconut Cupcakes

I am so excited about today's post.  Fortunately for me, Adam and I have no special dietary needs which means I get to bake whatever I want; I know quite a few people who aren't as lucky as we are.  Manni from I Bake Cakes is sharing an eggless cupcake recipe today.  This recipe can be easily altered to be completely vegan.


This cupcake was an experiment that turned out to be really good. The coconut is not too over powering but it gives the cupcakes more texture instead of taste. However if you prefer to have more coconut, then I would suggest using the reduced coconut milk instead of the regular milk. The frosting was a regular butter cream frosting which I flavored with coconut milk. I then dunked the frosted cupcakes in sweetened coconut. To top it off, I rolled out chocolate fondant for the “fake coconut” and used green fondant for the leaves.


Yields: 15 cupcakes

Ingredients

2 cups all purpose flour
1 ½ tsp baking soda
½ tsp salt
¾ cup granulated sugar
1 cup milk (I used 1% milk) or the reduced coconut milk (read below for more info)
1/3 cup oil (I used vegetable oil, canola should be fine)
1 tsp vanilla extract (I actually used a bit more!)
1 Tbsp vinegar
1 Medium size Banana
¾ cup shredded coconut (I had unsweetened kind)
4 Tbsp Cocoa Powder

Method:
  1. Pre-heat the oven to 350 F.
  2. In a medium sized bowl combine: flour, sugar, cocoa powder, baking soda and salt.
  3. In another bowl, mix: milk, oil, vanilla extract, and vinegar. Mix well. 
  4. Add the dry flour mixture to the wet ingredients slowly and stir until combined. (I ran this through my hand blender for a minute). This mixture is not thick as compared to the cake batter.
  5. Now add in the mashed banana and stir using rubber spatula.
  6. Fill each of the cupcakes until about 2/3 full. Transfer to the oven.
  7. Bake for 15-18 minutes, depending on the type of oven you have you may need to watch these. I had to do several batches to get the right texture. My trial ones came out dry but the last batch was amazing. To further test your cupcakes, take a clean toothpick and insert in the center; if it comes out clean, they’re done!
Frosting:

1 cup (2 sticks) unsalted butter, room temperature
2 ½ cups powdered sugar|
1/3 cup reduced coconut milk, room temperature
1 ½ tsp vanilla extract
1/8 tsp salt
1 ½ cups sweetened coconut

For Reduced Coconut Milk:

Bring coconut milk to a boil in large deep sauce pan over med-high heat. The milk will boil up high, so watch out! Reduce the heat to med-low and boil until the milk has reduced close to half of the milk. This can take approx. 30 minutes. Don’t worry too much if it’s not close to it!! As long as the milk reduces some, it’ll be fine. Next remove from heat and cool down completely. Store it in a small bowl with a lid and chill in the refrigerator. This step can be done a day or two before but remember to keep it chilled!

** Coconut milk is sold in cans, and they are sold in all the major grocery stores. I prefer the cans only because I know the ratio.

Manni's work is just gorgeous!  I picked some of my favorite pictures from her blog to share with you; she is truly an inspiration.


Don't these all look perfect?  Her work is so clean and impeccable.  I limited myself to only sharing pictures with cupcakes, but Manni also does gorgeous fondant cakes.  She was even in a cake competition last month.  Head over to say "hi" and share some love with Manni.

Monday, February 7, 2011

Almond Joy Cake

In December, I shared Chocolate Covered Coconut Almond Clusters with all of you.  For this recipe, you will need to make the coconut filling.  You can make the filling while your cake is baking, but make sure you get all the ingredients.  As I told you in December, I learned to make this cake for my friend Barb's birthday in August.  She just sent me the photos and said I should blog about it.

Ingredients
  • Chocolate Covered Coconut Almond Cluster Filling
  • 1 box white cake mix
  • 1 box vanilla instant pudding mix
  • 5 eggs
  • 1/3 cup water
  • 1/3 cup vegetable oil
  • 1 cup sour cream
  • 1 cup coconut flakes (you should have enough leftover from the filling above)
  • 1 tablespoon vanilla
  • 1/2 bag mini chocolate chips
  • 1 bag shaved almond
  • 2 pounds chocolate buttercream (I like to buy it directly from the grocery store bakery--it is delicious, and cheap)
Supplies
  • Mixer & bowl
  • Soft spatula for scraping
  • Angled spatula for spreading
  • Baker's spray (my best friend)
  • Pan (I used two 6 inch square pans, but two 8 inch circles would be fine)
  • Cooling racks
  • Cake plate (I use a piece of cardboard covered in foil for transport)
  • Large knife or leveler
  • Piping bag
Directions
  1. Preheat oven to 325 degrees.
  2. In large mixing bowl, combine cake mix, pudding mix, eggs, water, oil, sour cream, coconut flakes, and vanilla.  Mix until combined, but be careful to not over mix.
  3. Coat your pans with spray, and divide the batter evenly between both pans.
  4. Bake for about 35 minutes (test with a toothpick, when inserted, it should come out clean or with a few crumbs, but no batter).  Let cool for 10 minutes, then turn out onto cooling racks to cool completely.
  5. Cut the top off of the cakes with a large knife, or leveler.
  6. Smear a little frosting on the cake plate to secure the cakes.  Flip one cake cut side down.  Fill a piping bag with chocolate buttercream.  Cut a large hole at the tip and pipe a dam around the cake (this creates a barrier for the filling).  Spread the coconut filling inside the dam.  Sprinkle some chocolate chips and some almonds over the coconut.
  7. Place the other cake on top of the first cake (cut side down again), and frost the entire cake.
  8. Quickly, use your hands to sprinkle/press chocolate chips and almonds into the frosting before it dries.
Yum!  As an alternative, you might try making cupcakes.  Bake for about 18 minutes.  Pipe chocolate buttercream in a large circle on top, scoop coconut filling in the center, and finish with an almond.

I will be linking this up at these link parties.  Check out what else is out there!

Thursday, December 23, 2010

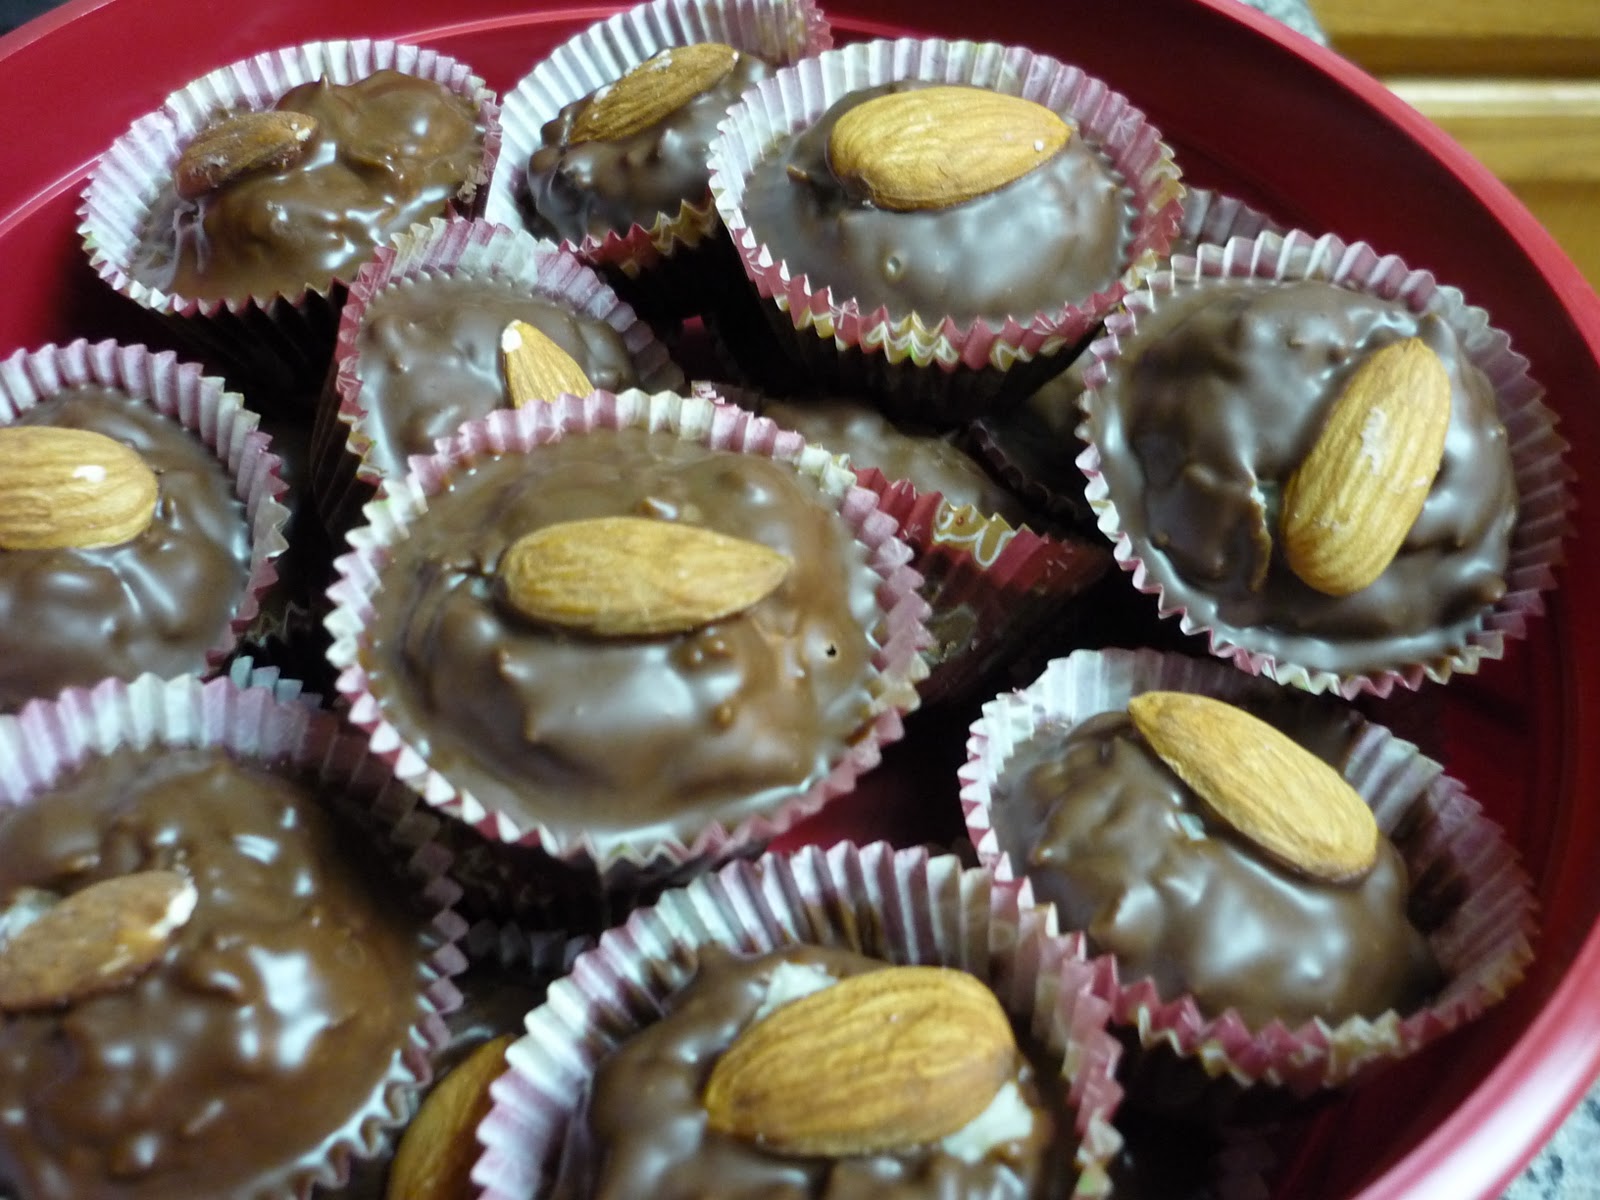
Chocolate Covered Coconut Almond Clusters

Almond Joys are one of the candies that I discovered while in high school.  I love the different textures and flavors that make them so delicious.  A few months ago, my friend Barb wanted an Almond Joy Cake for her birthday.  What I created with her that day, became on of my favorite cakes to make (and eat).  I now use the filling to also make these delicious clusters that are a replica of the candy bar I love.

Ingredients
  • 1 Tablespoon vanilla
  • 2 Cups sweetened flake coconut
  • 1 Cup powdered sugar
  • 7 oz. sweetened condensed milk
  • 1 bag milk chocolate chips
  • 1 Cup whole almonds
Supplies
  • glass dish or bowl
  • Medium or large pot
  • Medium or large glass bowl
  • Fork
  • Toothpicks
  • Small melon baller
  • Metal whisk
  • Cookie sheet
  • Parchment paper
  • Mini muffin pan
  • Mini muffin liners
Directions
  1. Pour the sweetened condensed milk into the glass dish
  2. Use the whisk to mix in the vanilla
  3. Adding 1/2 cup at a time, whisk the powdered sugar into the mixture
  4. Add the coconut to the mixture, and mix well
  5. Spread the mixture so that it is even throughout the dish
  6. Put dish in the refrigerator to chill for 1 hour
  7. Cover the cookie sheet with parchment paper
  8. Remove the coconut mixture from the refrigerator, and scoop one scoop with the melon baller into your hands
  9. Form into a ball and set on the parchment paper
  10. Stick tray into refrigerator
  11. Fill mini muffin pan with liners
  12. Using the glass bowl, and pot, create a double-boiler (see instructions on White Chocolate Peppermint Popcorn)
  13. Melt the milk chocolate completely
  14. Use a toothpick to dip each ball into the chocolate
  15. Use the fork to help transfer covered ball into muffin pan
  16. Place one almond on top of ball
  17. When you have covered all balls with chocolate, refrigerate for another hour
  18. Chocolate should set, and you should be ready to enjoy!


.